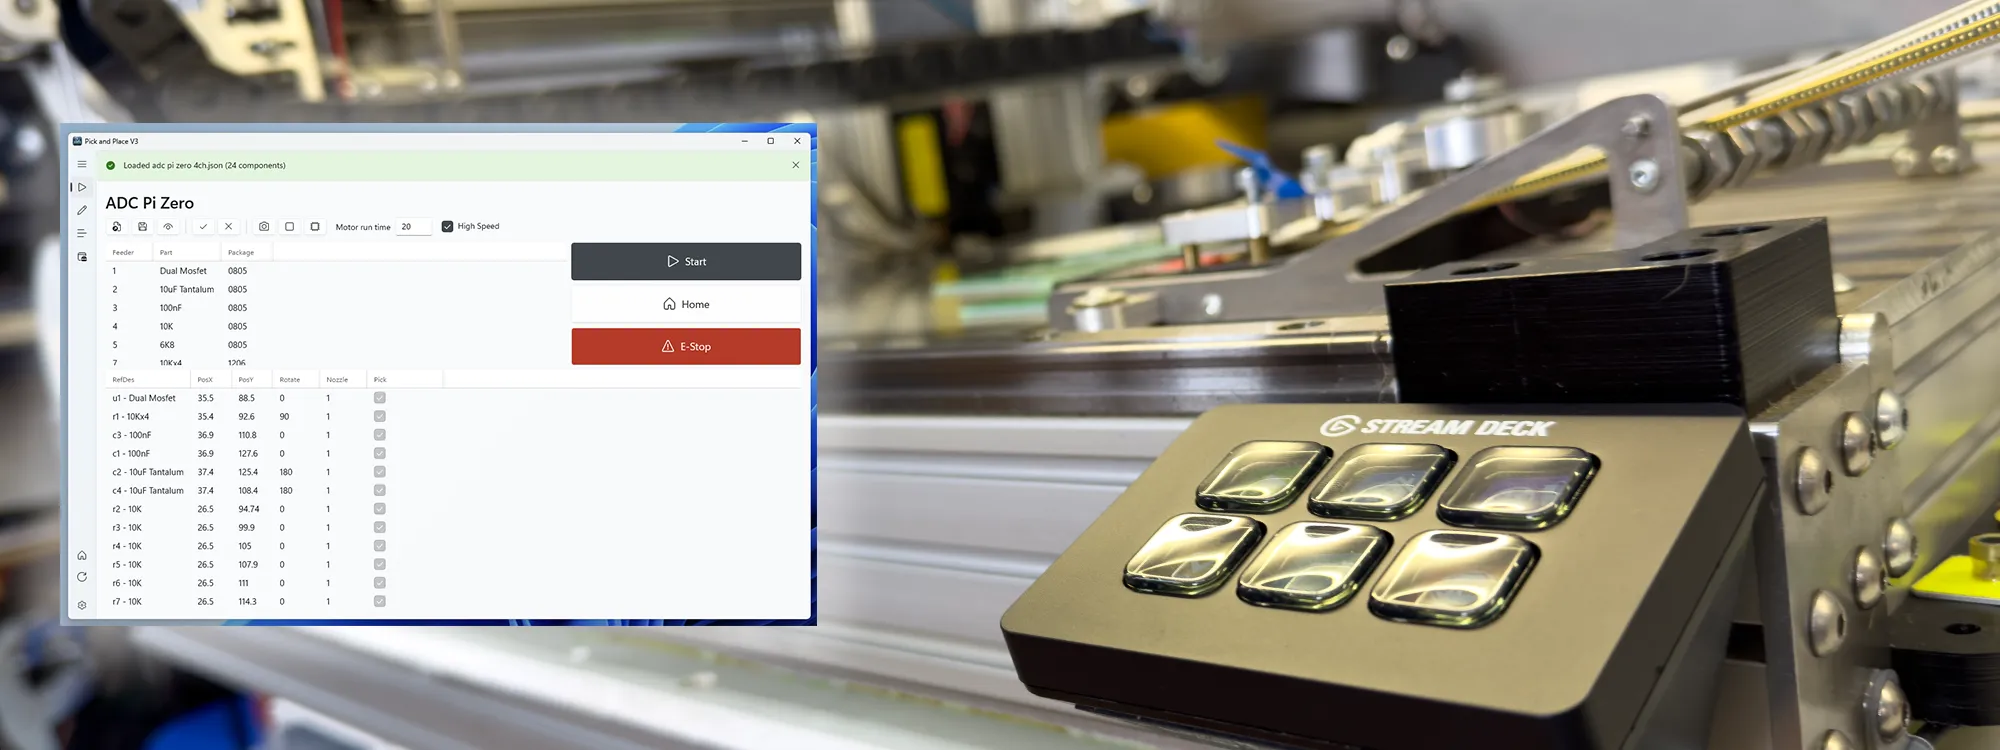
In November 2017 I finished the previous version of the software to run our DIY Pick and Place machine, it has built thousands of our Raspberry pi expansion boards over the past nine years and has been very reliable.
You can view all the blog posts about the pick and place project at briandorey.com/category/diy-pick-and-place.
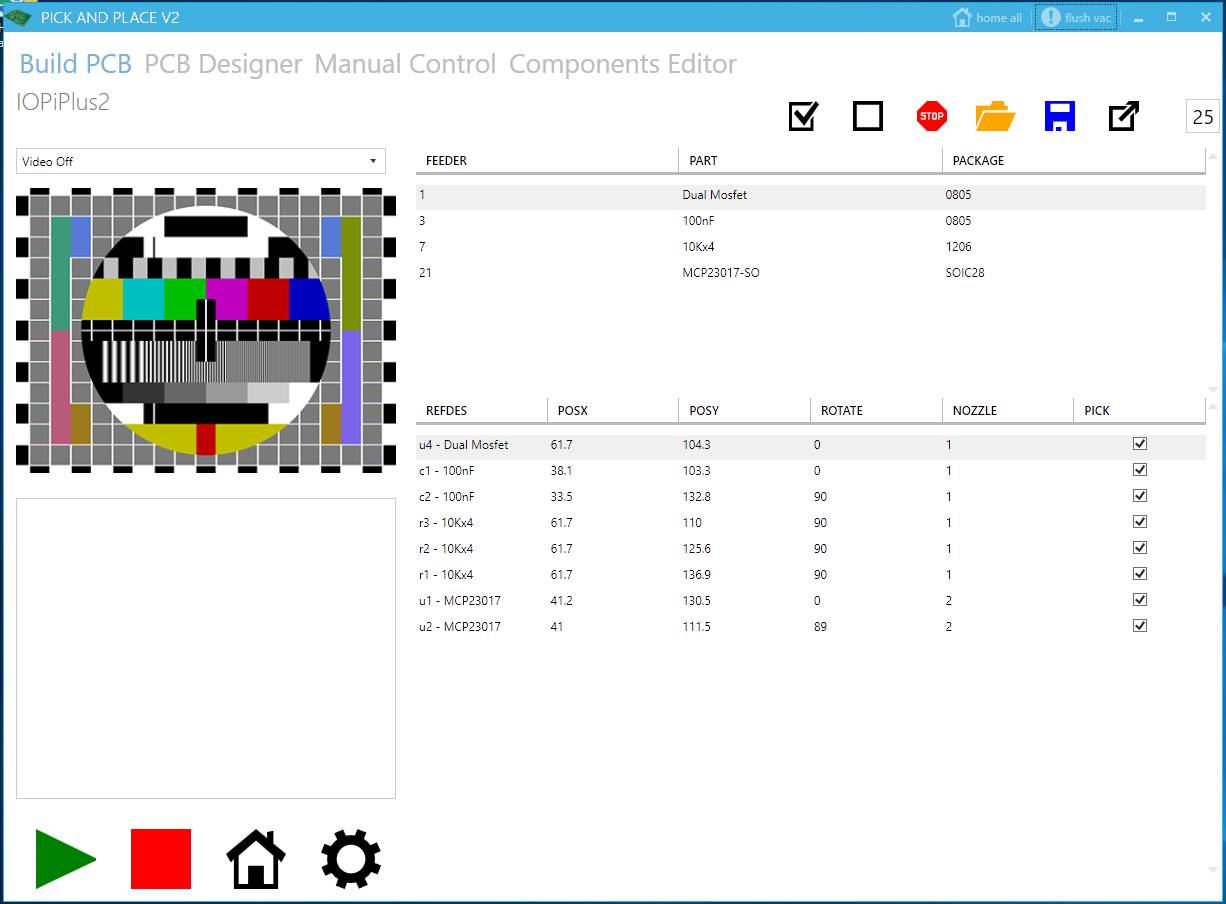
The first software version was written to run on a Microsoft Windows 8 computer and was then updated to run on Microsoft Windows 10 and later Windows 11.
The 2017 version used the ModernUI libraries for the user interface and saved data using XML config files for the board files and component data. The vision system used Aforge.Net which has not been maintained or updated since 2013. You can view the older version at briandorey.com/post/pick-and-place-software-version-2-2-update.
The decision to upgrade the software
Over the past few years we have been migrating our legacy Asp.net 4.5 websites and code to ASP.Net Core version 8 then to version 10 which has been a lot of work changing thousands of lines of code to the new frameworks and code methods and greatly improving the performance of the websites and software.
ASP.Net Core is a framework for building web apps and services with .NET and C#.
The older version of the KFLOP motion controller drivers were unsigned and this caused installation issues on Windows 11 requiring disabling some of the system protections.
Later versions of the drivers didn’t have this signing problem but the older Pick and place software would not work with the updated libraries and drivers.
I decided it was finally time to upgrade the software for the pick and place machine after a recent Windows 11 reinstall on our loft workshop computer and the problems with the installation of the older unsigned drivers.
Version Three Pick and Place Software
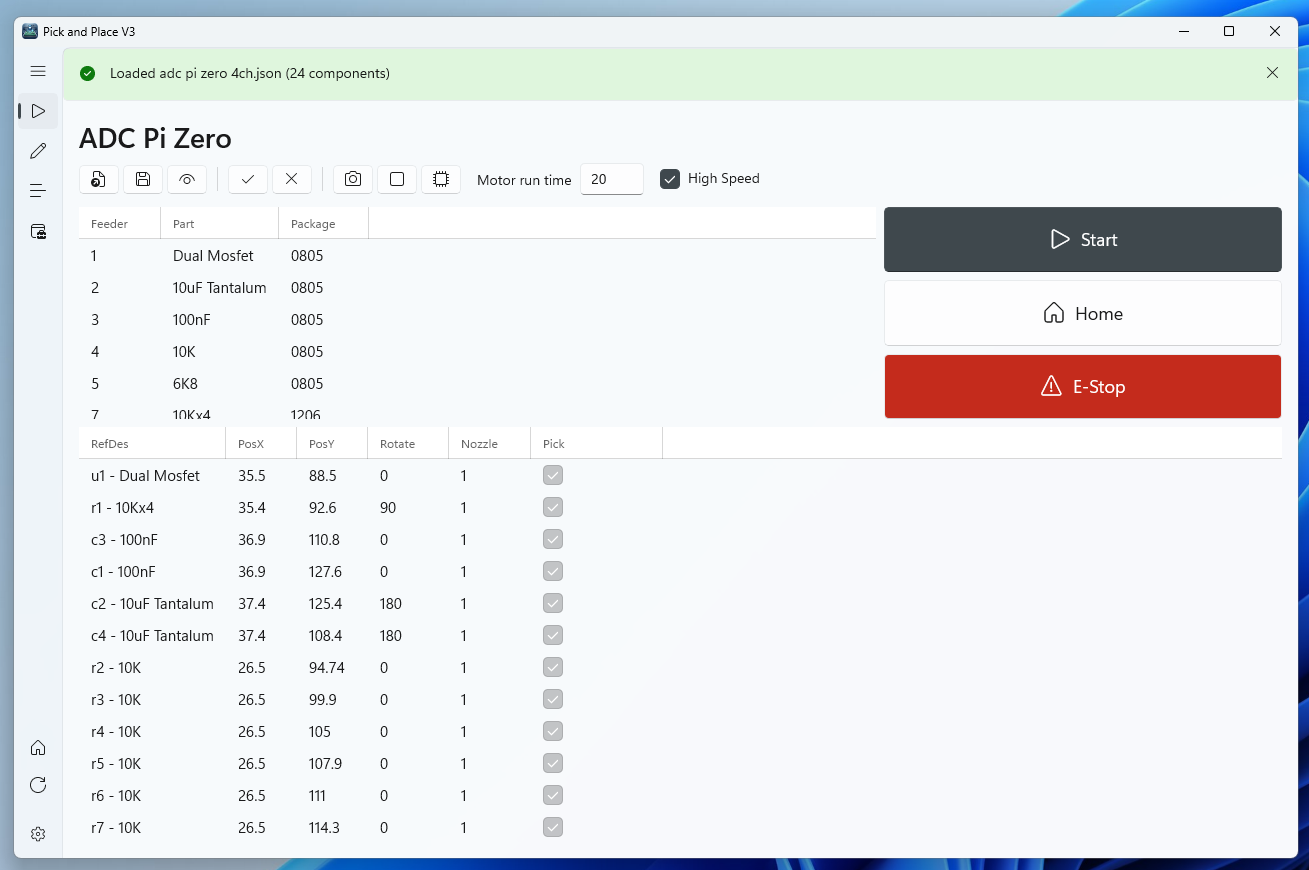
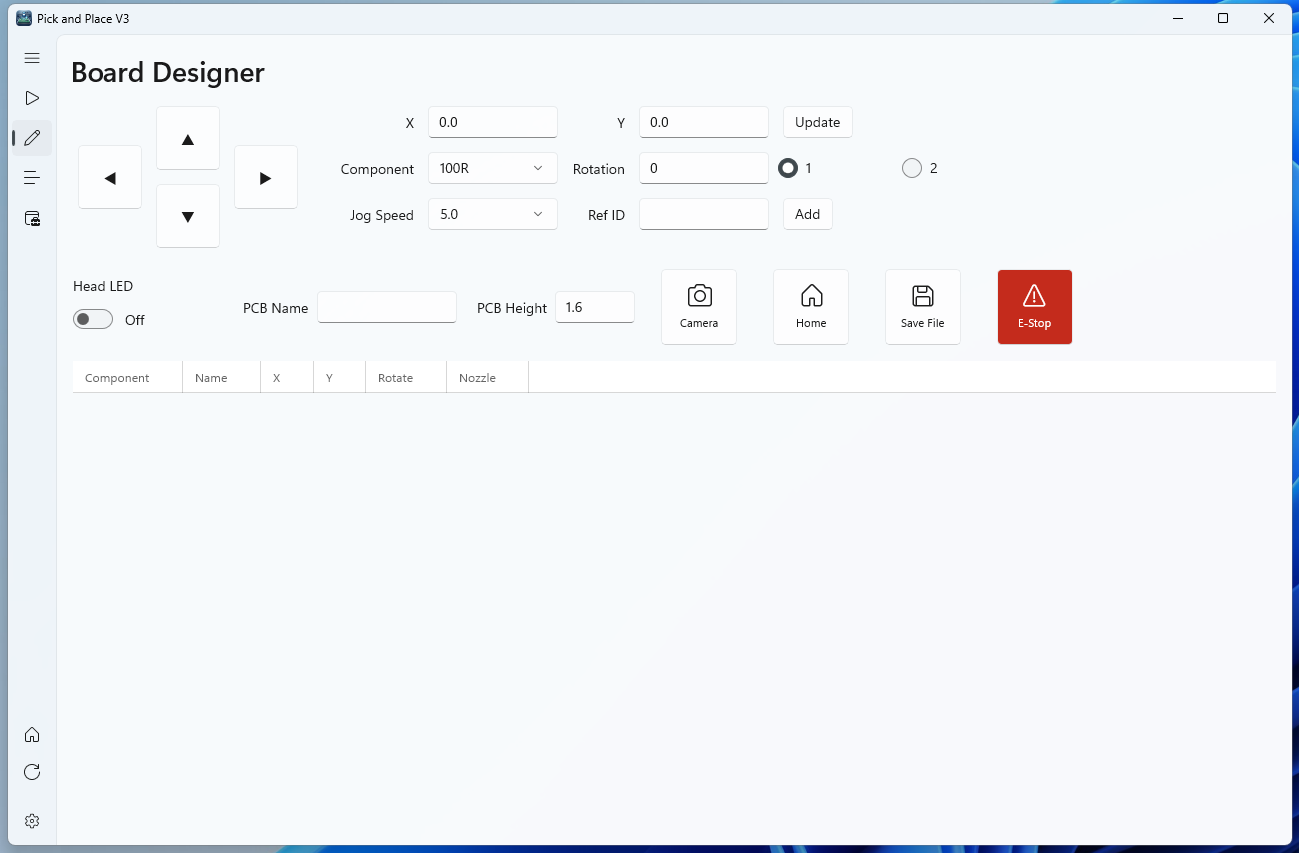
The new software would use Windows Presentation Foundation and ASP.Net 10. The user interface would use one of the built-in templates in Microsoft Visual Studio with a left side navigation bar which can collapse and the different pages/screens would be on the right side of the application.
The camera vision system was changed to use the OpenCvSharp4 library which is an active project.
KMotion 5.4.5 driver was installed for communication with the controller, this can be downloaded and installed from https://www.store.dynomotion.com/pages/download
The following Nuget packages are required:
- CommunityToolkit.WinUI.UI.Controls.DataGrid
- Microsoft.Windows.SDK
- Microsoft.WindowsAppSDK
- OpenCvSharp4
- OpenCvSharp4.Extensions
- OpenCvSharp4.runtime.win
- System.Drawing.Common
Downloads
The code for the new software can be downloaded from GitHub: github.com/briandorey/DiyPickandPlaceSoftware-V3-2026
Converting legacy code
Upgrading the UI frameworks was going to be challenging as I had not looked at the old code for many years.
Every part of the old software had to be upgraded to use the new frameworks and api’s.
I decided to try Claude Code AI to assist with the new project and this was very useful with finding legacy bugs in the old code which caused a lot of problems with the new version. This was my first experience with Claude AI for developing applications.
Claude AI was helpful in adding detailed debugging and logging into the code classes which made the development much faster.
The USB hid interface class was causing a lot of problems and after debugging the code the problem was tracked down to the DLL being 32 bit and the new software is 64 bit, also the DLL was trying to use a Windows.Forms namespace which is not available in the new framework. I was able to find the source code for the DLL and it was upgraded to be 64 bit and use the new frameworks enabling the computer to communicate with the Pick and Place controllers.
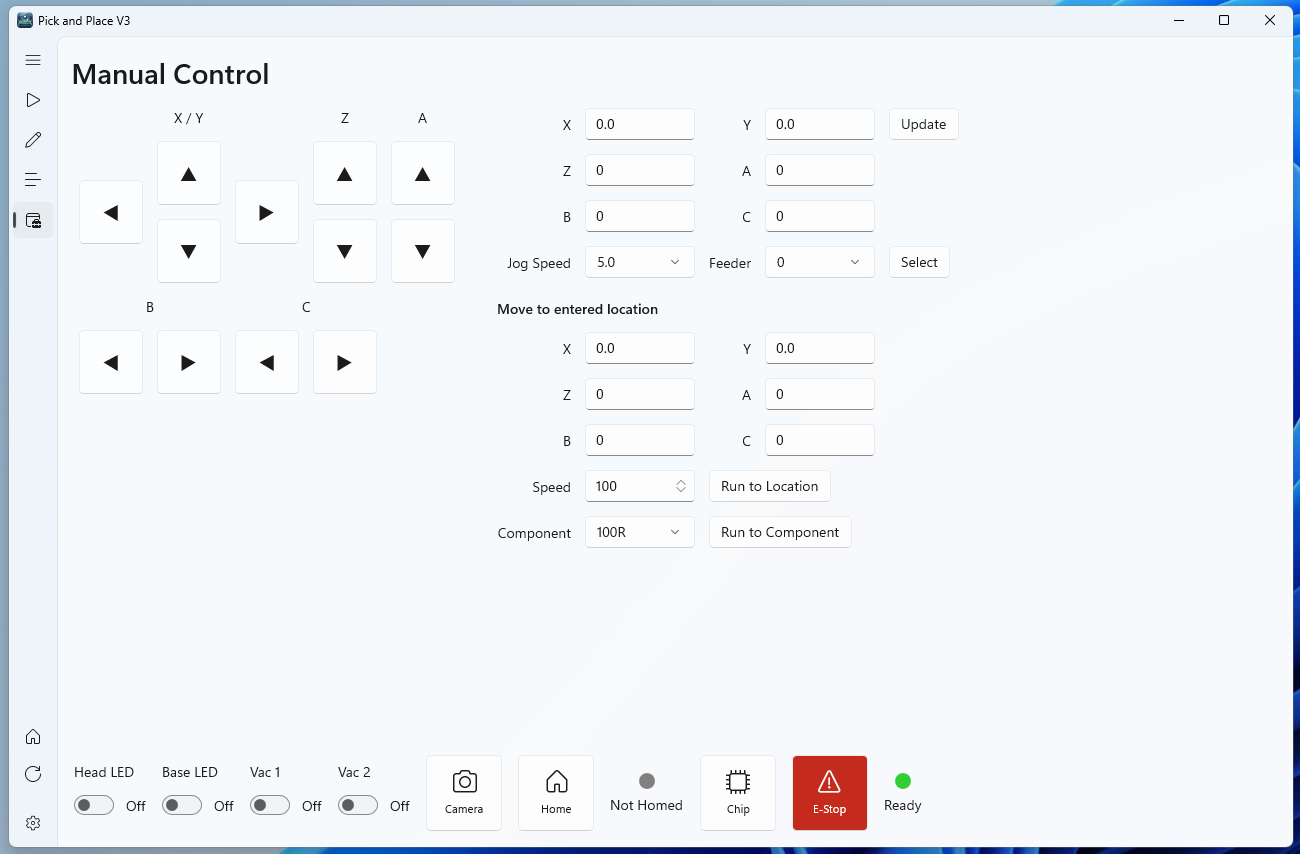
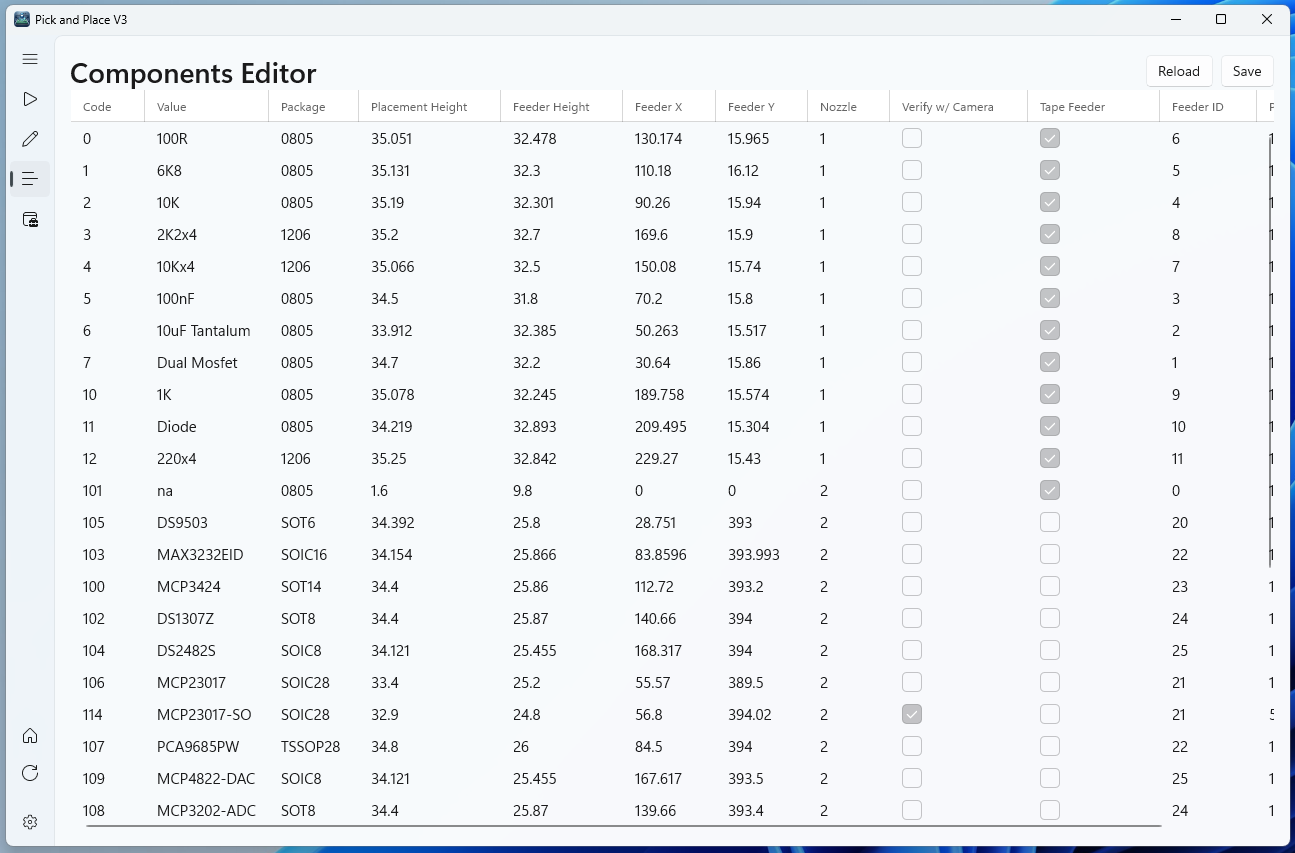
The old software used XML files to store the pcb components locations and System.Data.Dataset’s and DataTables to process in the code, I wanted to move away from this due to legacy bugs with the pcb editor part of the software and move to a strongly typed object system with lists of the components populated from JSON files.
With the build data in this format I could then use Linq to parse and filter as needed.
The user interface was completely overhauled using the latest controls and icons and the old DataGrids being replaced with the CommunityToolkit.WinUI.UI.Controls.DataGrid controls. This uses a different way to bind data so the listing and grids code was rewritten to make use of the new features.
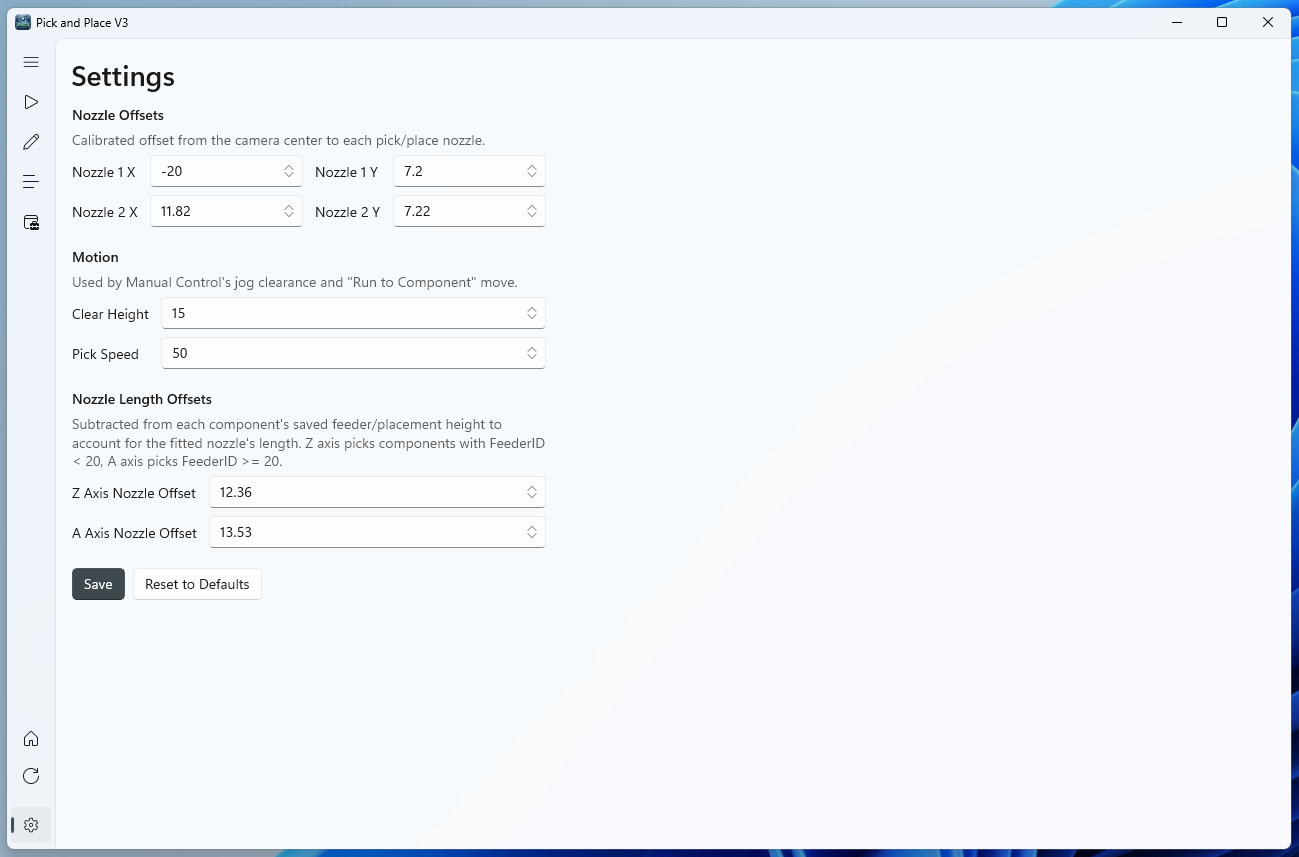
A new settings page was added which gives easier access to the variables for nozzle position offsets, motion clearance and nozzle length offsets which were needed due to changing the nozzles on the machine. The new nozzles are longer than the previous version so the picking and placement heights needed to be changed. This could have been done by updating all the component and board files or adding an “offset” value which is then subtracted from the previous height which was a lot easier overall and allows for faster updates if needed.
Control upgrades
For the past 10+ years, we had to either click the start button or use the space bar on the keyboard to start each pcb placement run. I had a spare Elgato Stream Deck Mini which was free with the Elgato lights we purchased a couple years ago. This was the ideal size to mount to the front of the Pick and Place machine and with its six buttons we could assign the start, home, e-stop and other functions to the customisable keypad.
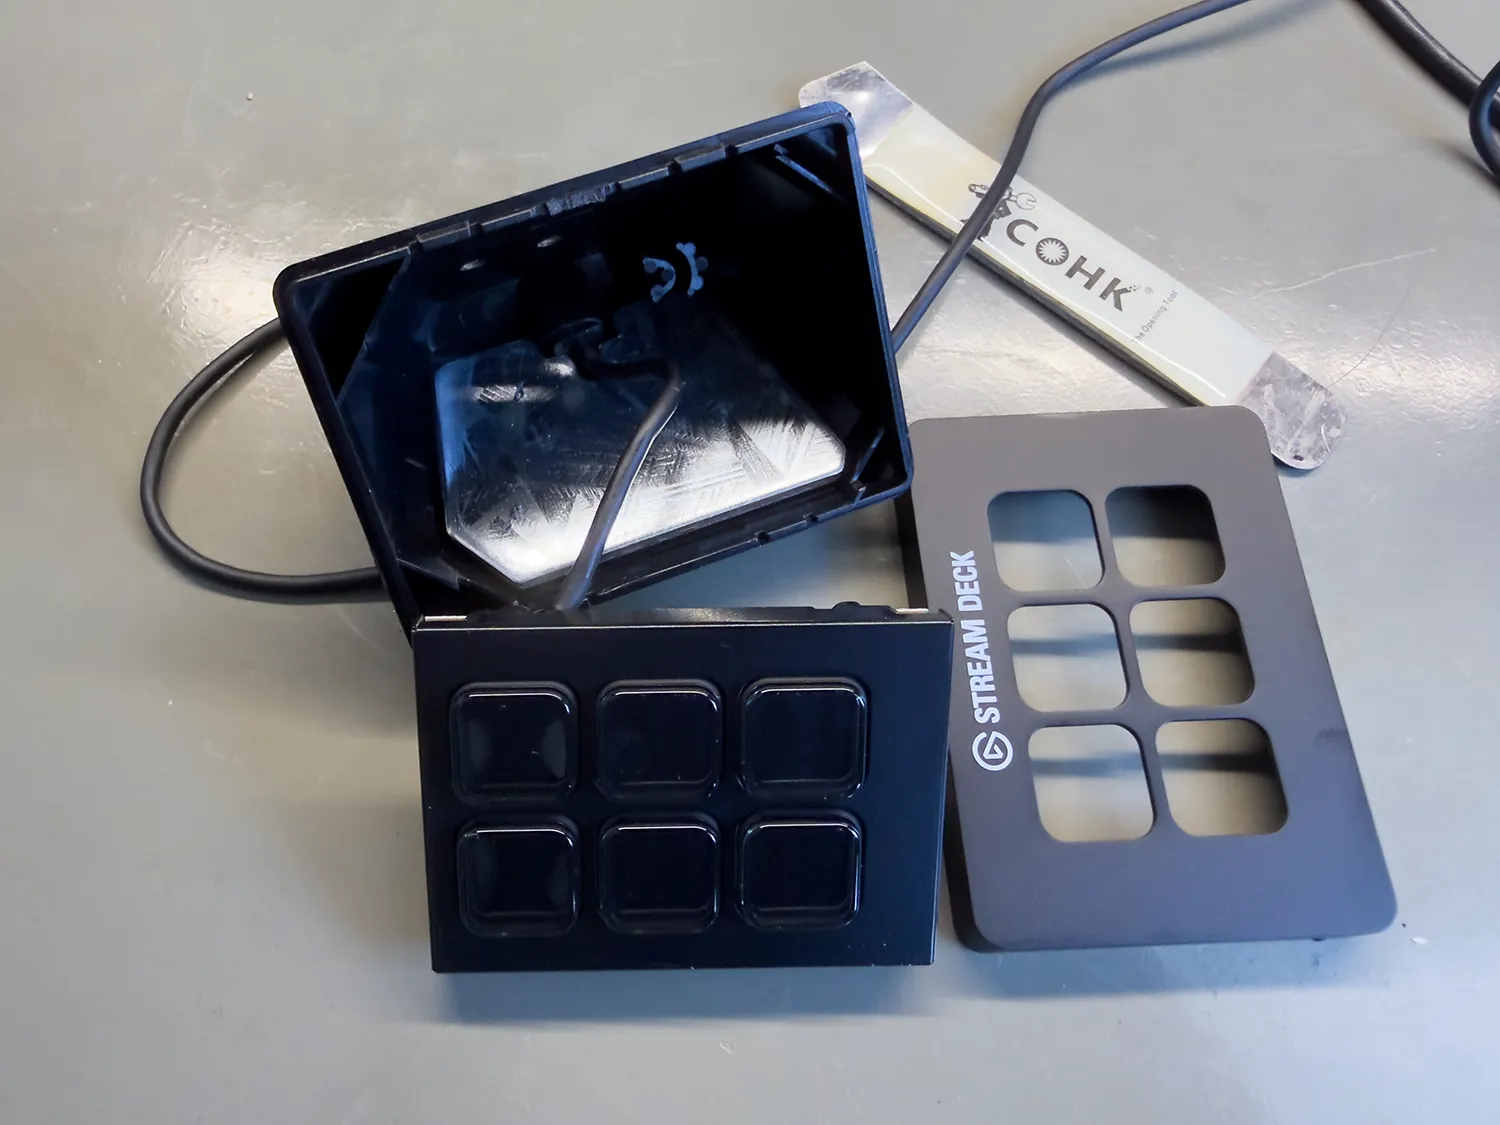
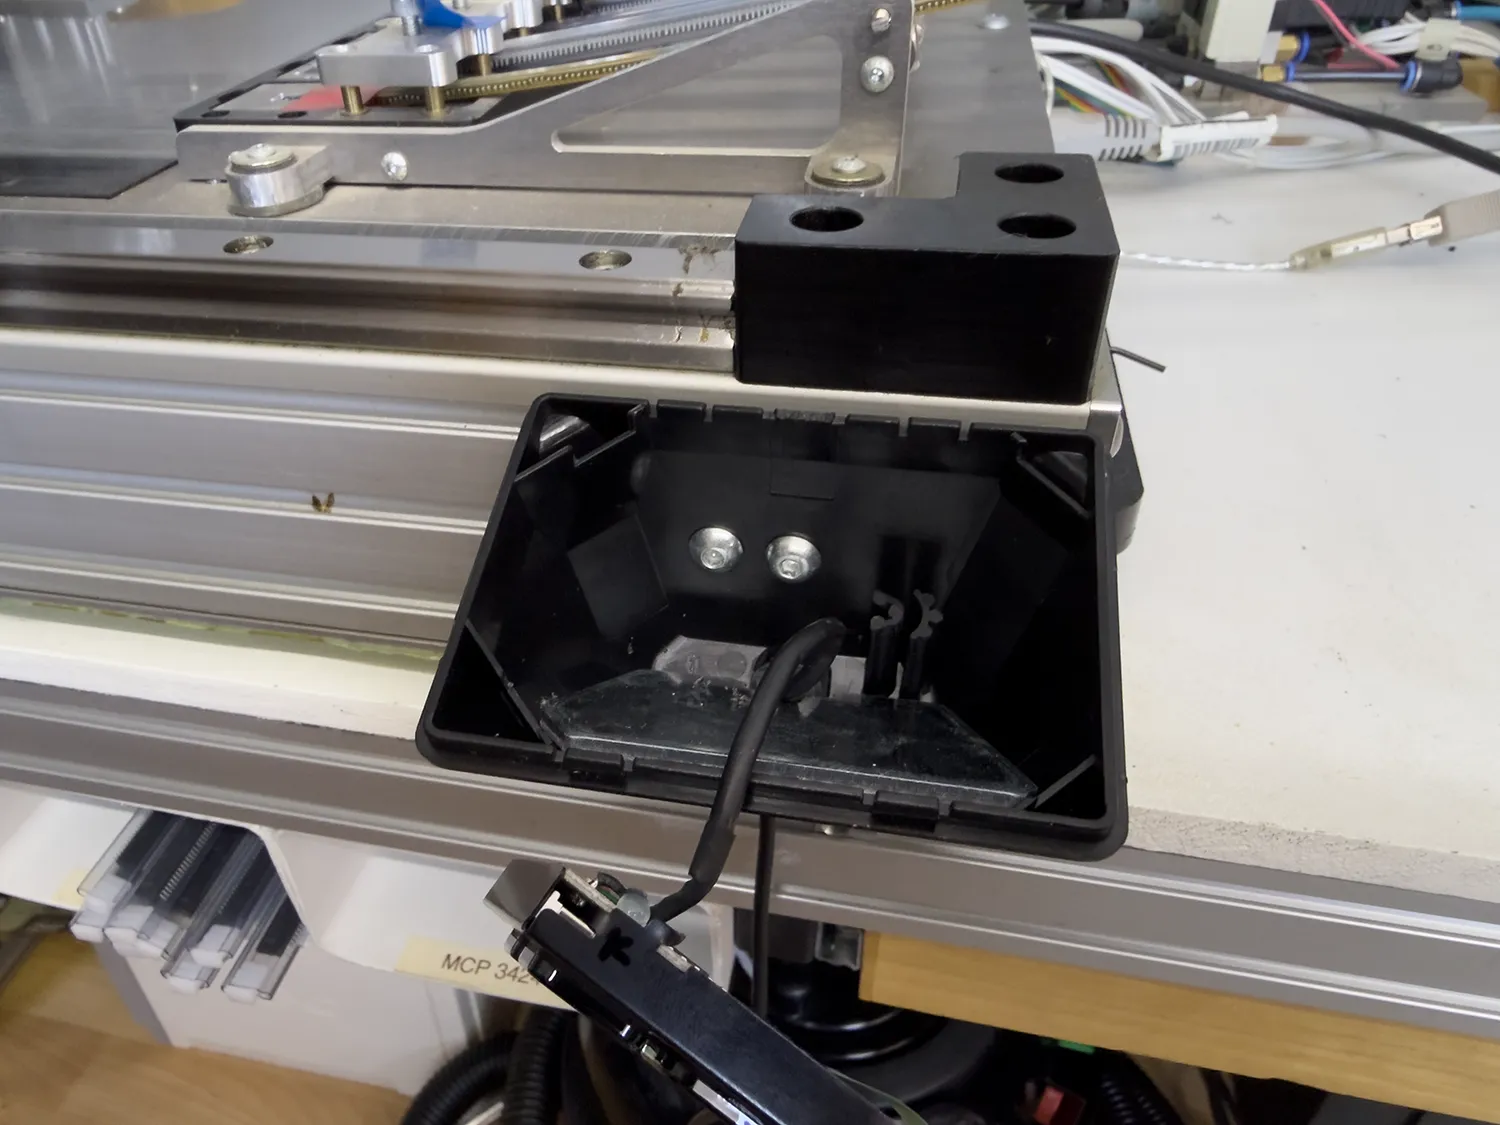
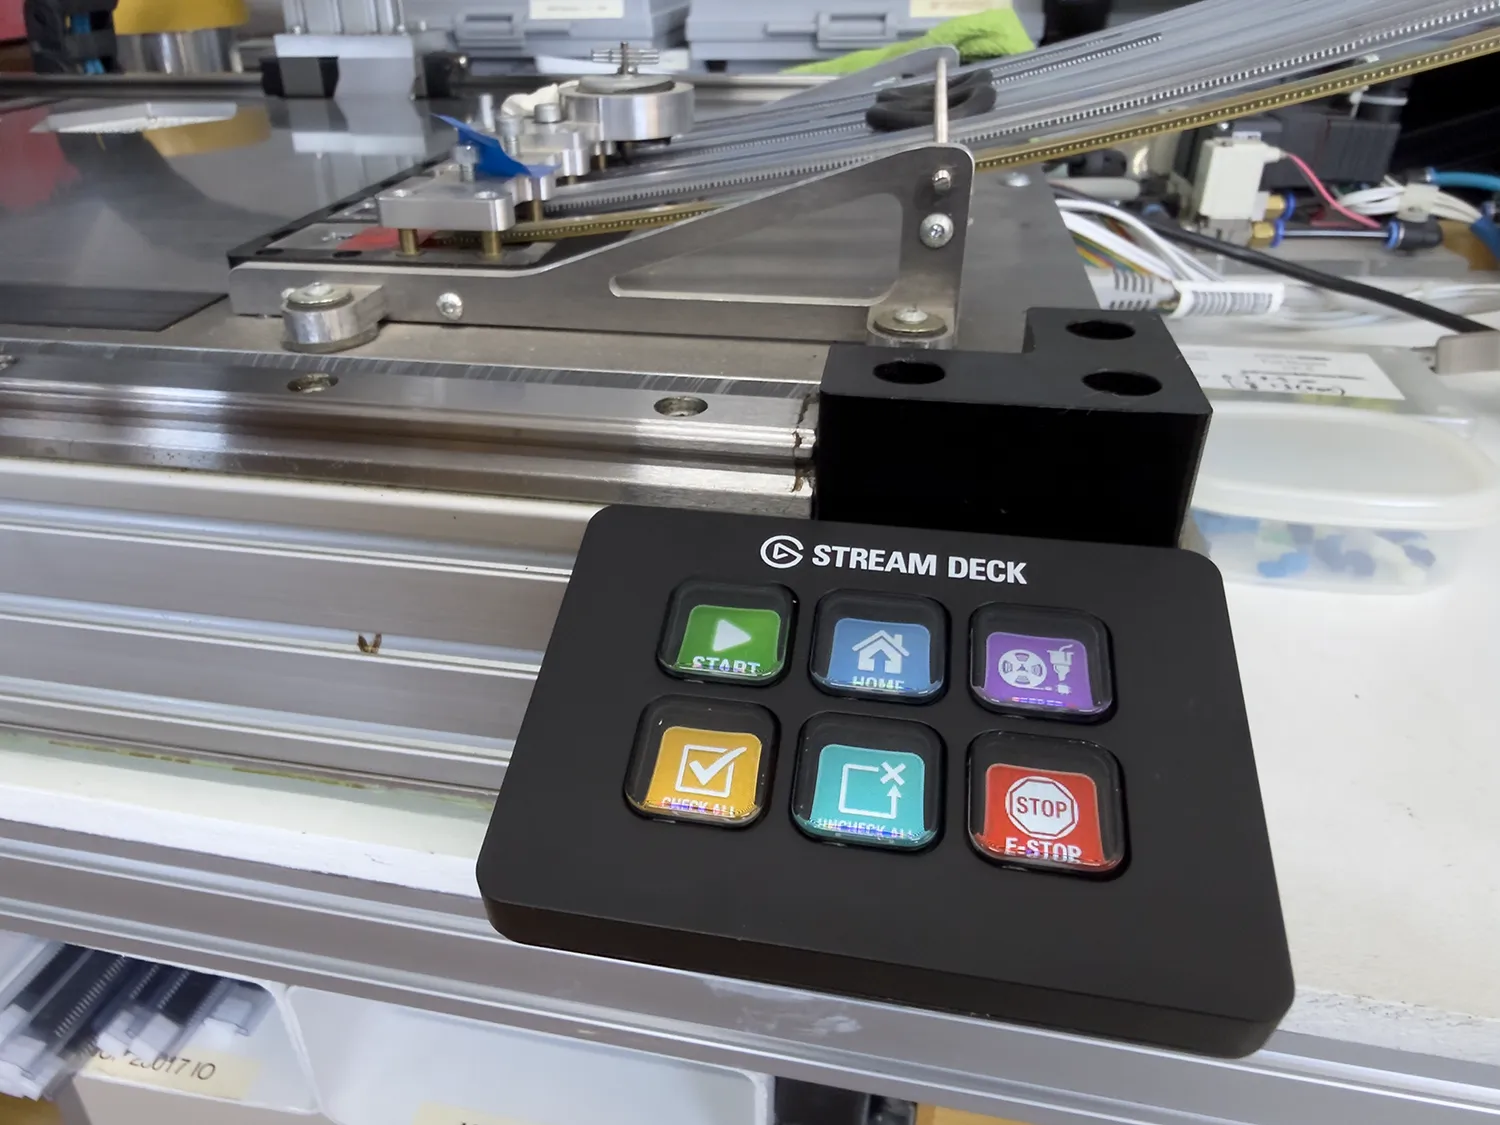
This was fitted to the machines rails using M5 bolts and another usb cable was routed to the computer.
Stream Deck / global hotkeys
The app registers global hotkeys (Windows RegisterHotKey, handled in MainWindow.xaml.cs) on the F13–F18 keys. These have no physical key on a standard keyboard, so they won't collide with any other shortcut on the PC. In the Elgato Stream Deck app, assign each button a System → Hotkey action set to the corresponding key below - no plugin required.
| Stream Deck button | Key | Action | Works from any page? |
|---|---|---|---|
| 1 | F13 | Start | No - requires the "Build PCB" page active |
| 2 | F14 | Home | Yes |
| 3 | F15 | E-Stop | Yes |
| 4 | F16 | Chip Feeder | No - requires the "Build PCB" page active |
| 5 | F17 | Uncheck All | No - requires the "Build PCB" page active |
| 6 | F18 | Check All | No - requires the "Build PCB" page active |
Home and E-Stop are handled directly by MainWindow and don't depend on which page is showing. Start, Chip Feeder, Check All, and Uncheck All operate on state (loaded board, feeder number) that only exists on the "Build PCB" page, if that page isn't active when one of those hotkeys fires, the app shows a status warning instead of doing nothing silently.
Camera functionality changes
The old software had a camera preview area on the build page but we never used it due to the USB webcams causing lag issues as it is connected to the internal USB 2.0 hub. The camera was only used when building a new PCB board file so this was removed from the page making the layout more compact and easier to use.
The software was originally going to use vision detection using the base camera to check the location of the part on the picker nozzles but we could not get this to work due to limitations with the basic webcam used. The new OpenCVSharp library should make this easier in future if we replace the current webcam.
Legacy Issue fixing
The old software had a few issues which didn't cause us any problems due to workarounds but with the rebuild we decided to correct these at the same time.
- Buttons: The Start button could be pressed multiple times resulting in the running build process to restart, a check has been added to stop this. This is also useful with the addition of the Elgato Steam Deck Mini buttons.
- Navigation: Changing pages / screens used to reset the pages so any loaded board files would reset. The code has been changed to preserve the current content.
- Components Editor: In addition to the change to use a JSON format for the data files, this has also been updated so if the components have been changed, the application no longer needs to be restarted for the placement code to see the updated information.
- Information Bar: The new app has a status / information bar which shows any error or status messages on all pages.
Building and deploying the software
I created a folder at C:\PickAndPlace and updated the .csproj file and .pubxml file to build to this location.
The software can be built and deployed at the command prompt using:
    cd “pathtoprojectfiles”
    dotnet publish PickandPlace2026.csproj -p:PublishProfile=win-x64.pubxml -c Release
If you want to remove the unused language files in the folder you can use the following powershell script:
Get-ChildItem "C:\PickAndPlace" -Directory | Where-Object {
    $_.Name -ne 'en-GB' -and (Test-Path (Join-Path $_.FullName 'Microsoft.ui.xaml.dll.mui'))
} | Remove-Item -Recurse -Force
Running the software
The KFLOP controller and USB controller need to be powered on before starting the software.
On startup the software connects to the USB controller and returns a status message when connected, next it connects to the KFLOP board and updates the status bar.
The machine must be “homed” before the pcb file can be loaded and run. If you do not home the machine first you will get a warning message.
This sets the X, Y, Z and A axis back to their default locations on the machine and sets the zero points for each axis.
The pcb file can be loaded by clicking the Load icon on the icon bar and select your pcb’s json file.
This will populate the feeders list and the components locations list.
Pressing the Start button will start the build process.
After the build process is completed, the machine will run its homing function again and it will be ready for the next pcb.
Individual components can be placed by unticking the components you don’t want to place and the machine will place the remaining ticked parts.
There are buttons on the page to uncheck all and check all, so it is easier to change the selection if you only want to place one or two components.
Pick and Place Nozzle Changes
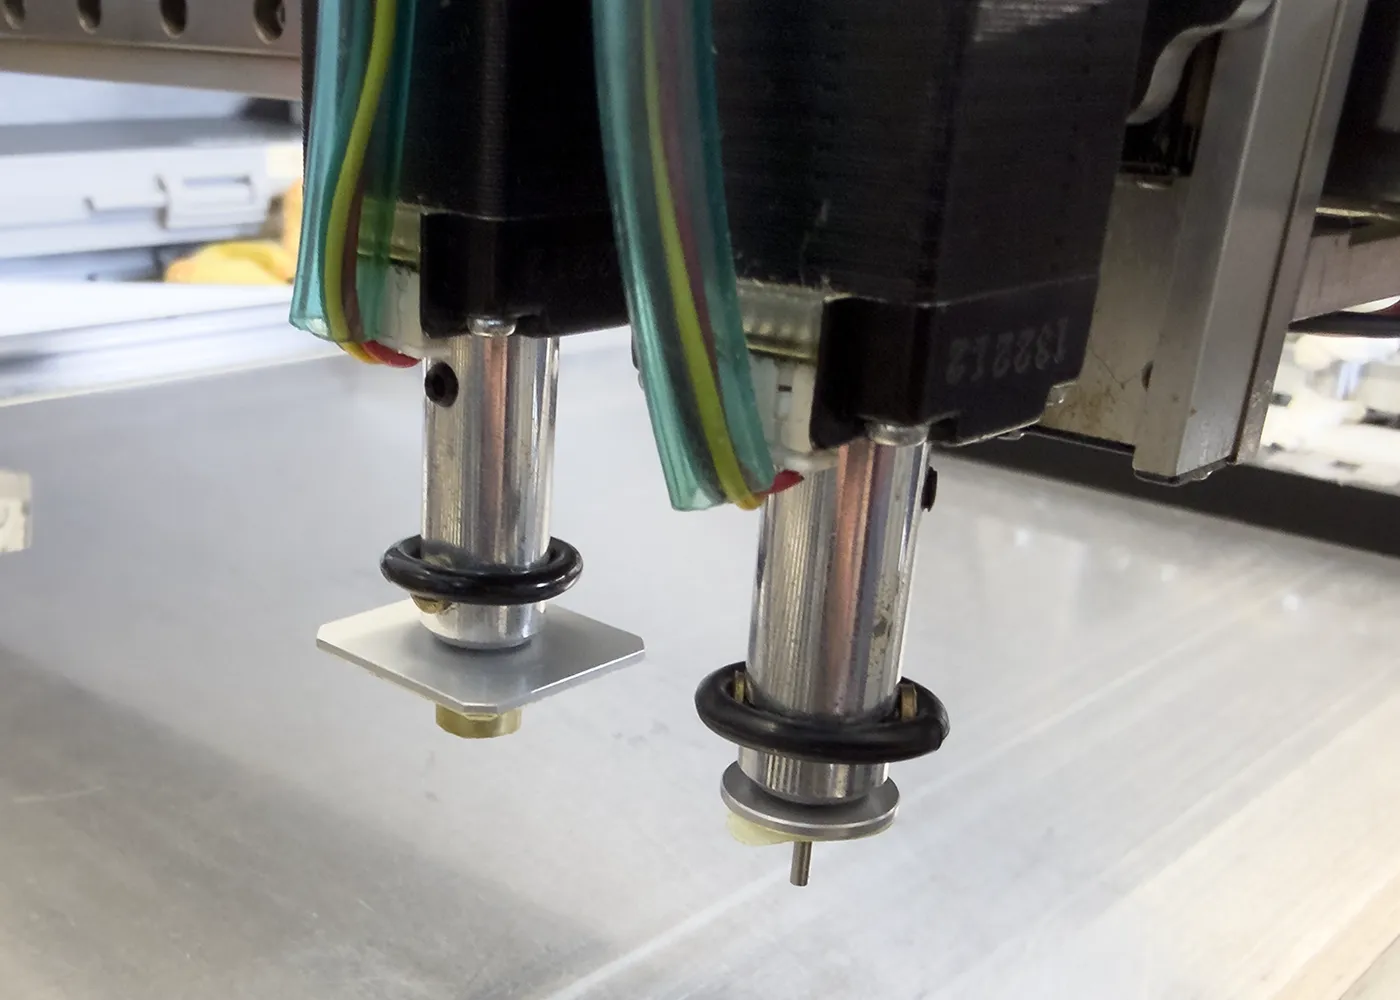
The machine has Fuji CP6 nozzles on the picker head which are fixed height and use a small metal nozzle tip to pick and place the parts.
A major limitation with this type of nozzle is the lack of vertical movement to allow for slight differences in PCB height and component heights.
We purchased a set of JUKI nozzles and quick release adapters and these have a spring which allows a small amount of vertical movement when picking and placing parts.
The adapters were ordered from aliexpress.com/item/33014044842.
Nozzles ordered from aliexpress.com/item/1005003589532824.
The quick release adapters have three ballbearings and these fit into a small groove in the nozzle adapter with a silicone tube to hold the bearings in place and apply pressure to hold the nozzle. When inserting the nozzle the bearings did not hold it in place and the slightest sideways pressure would result in the nozzle dropping out of the adapter.
With the bearings removed, I could see that the indent on the nozzle was not high enough in the adapter and so the bearings only gripped the edge causing it to easily come apart.
Using the lathe we removed approx 0.5mm of material from the end and after this modification the bearings located into the slots with a more positive feel but the pressure from the silicone hose was still not enough to stop the nozzle from dropping out so we added a small cable tie over the bearings and with the additional pressure, the nozzle now stays in place.
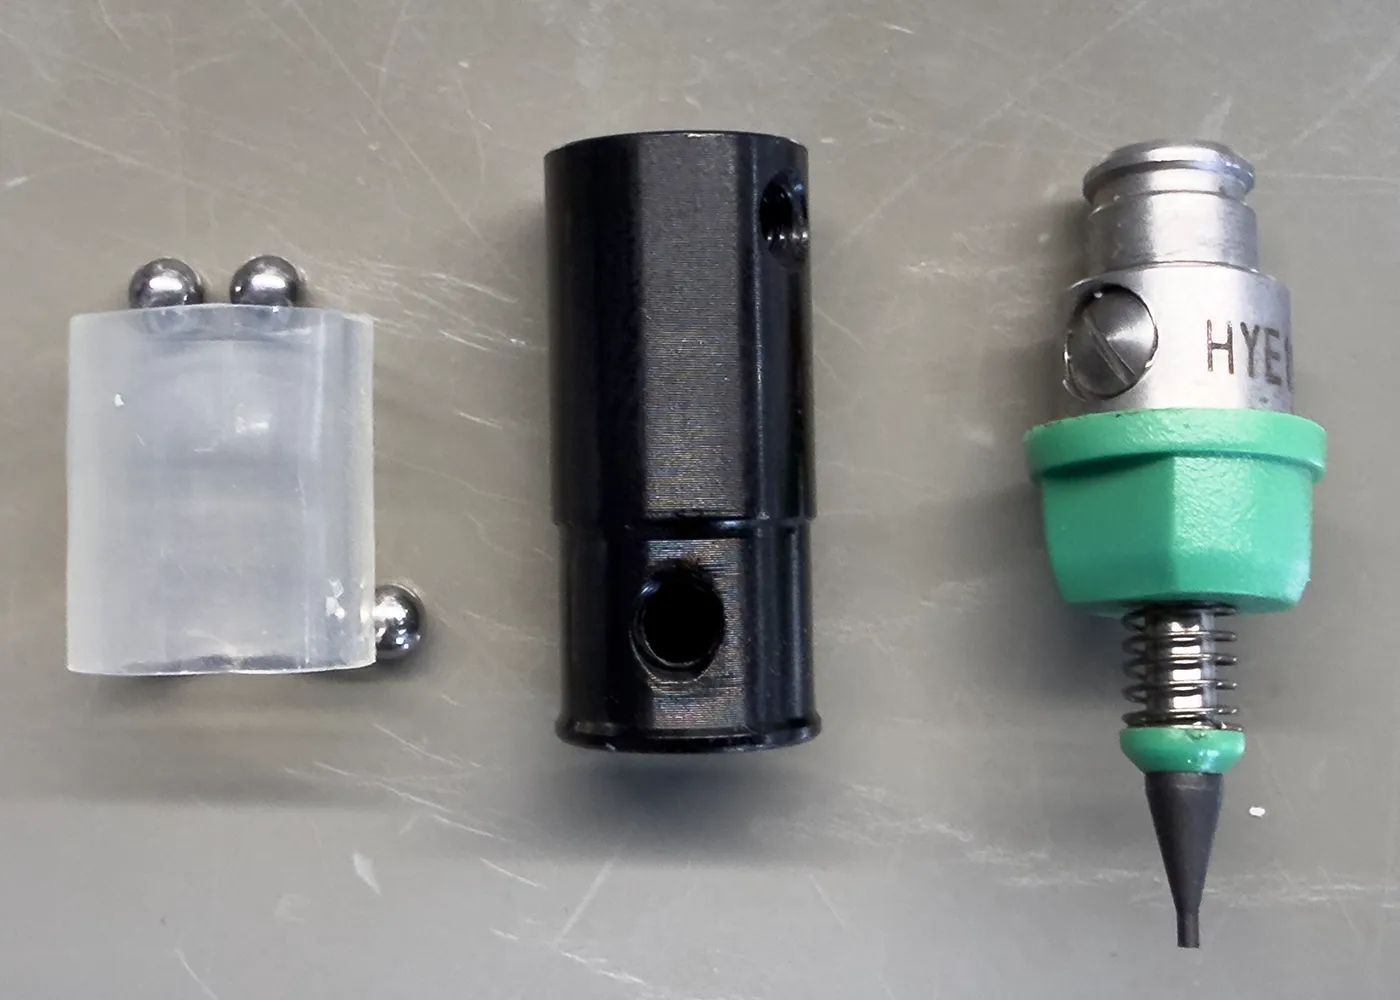
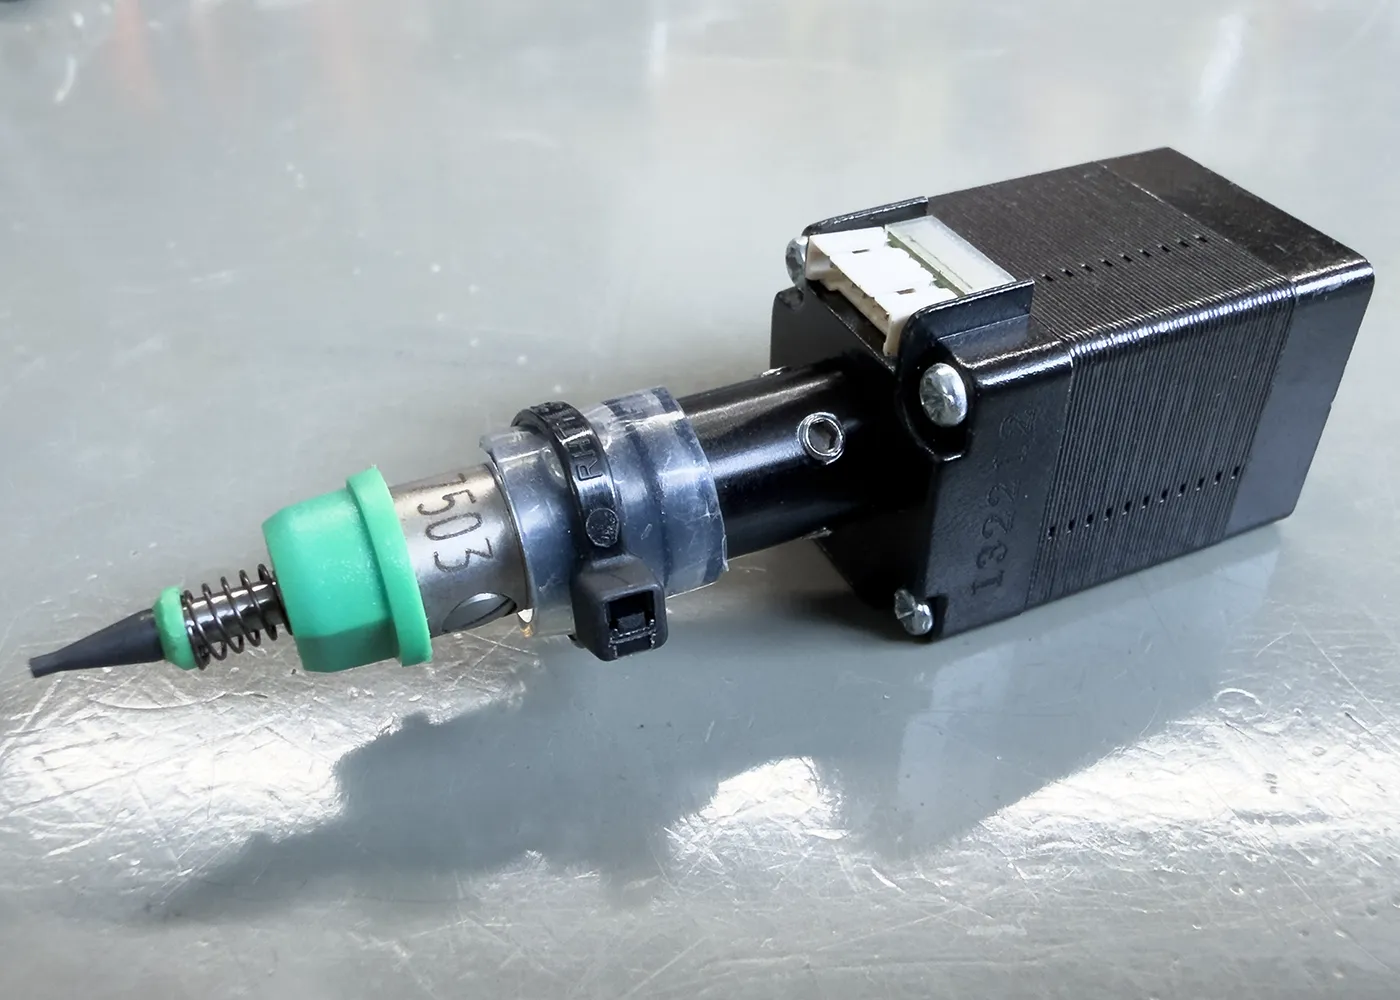
This modification was made to both nozzle adapters and the old nozzle adapters were removed from the stepper motors.
We installed the new adapters but after testing for rotational runout we found that one of the adapters had over 1mm of movement at the tip of the nozzle. As this was not usable for picking components we removed it again from the stepper motor and measured the 5mm hole in the adapter and found it was oversized.
The adapters have a pair of grub screws to hold them to the motor shaft but as there was a small amount of sideways movement when tightened, we then drilled and tapped the adapter for another pair of grub screws at 90 degrees to the others. With the stepper motor removed and clamped to the workbench we carefully aligned the adapter and new nozzle by tightening each grub screw as required until there was minimal runout at the tip of the nozzle.
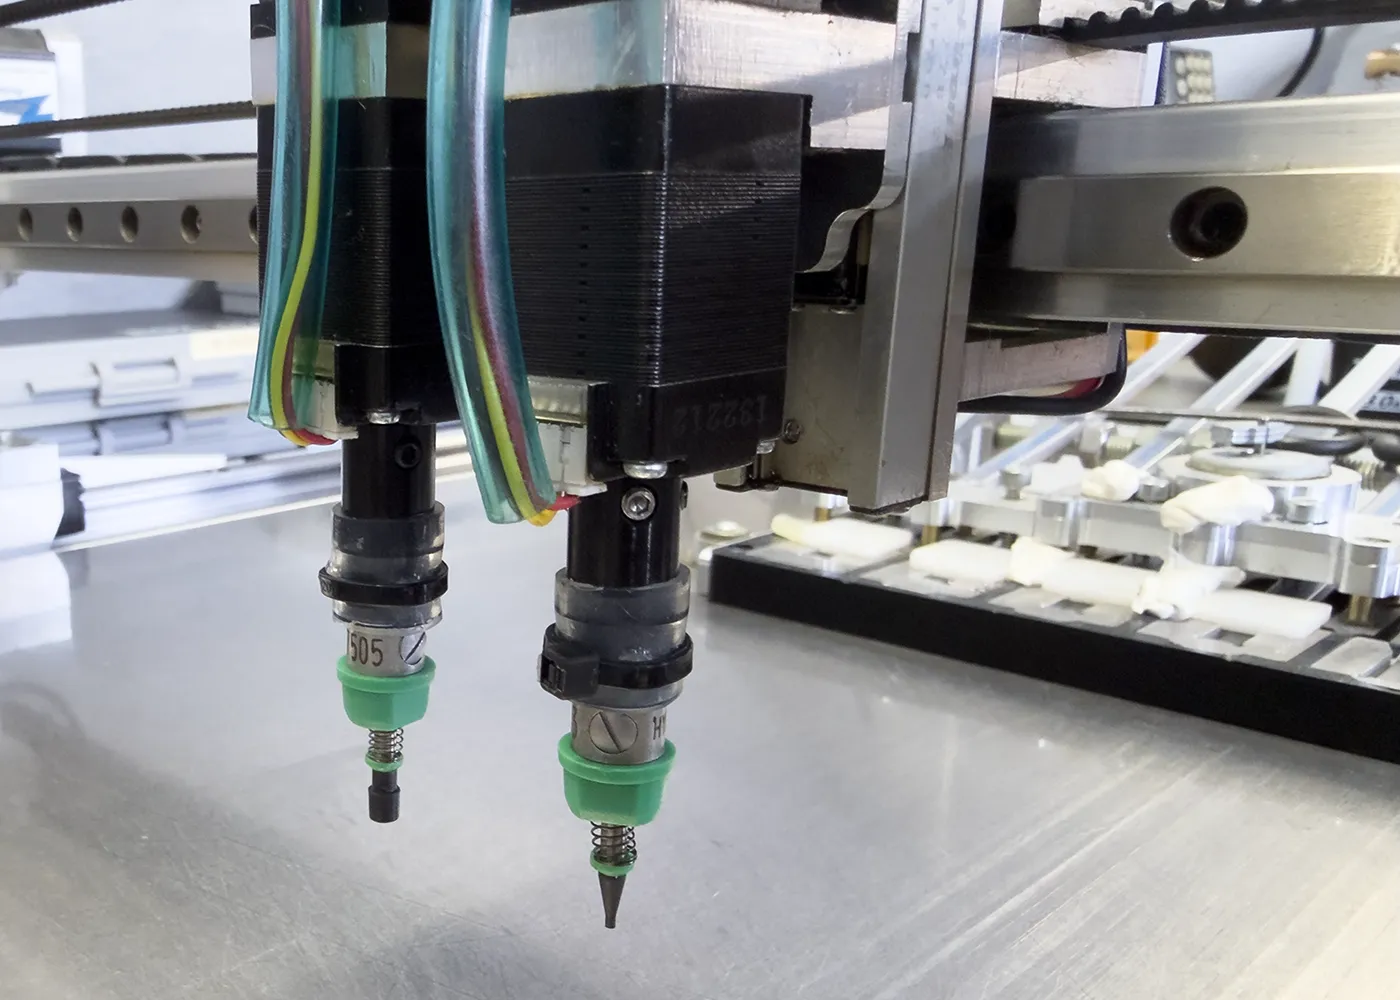
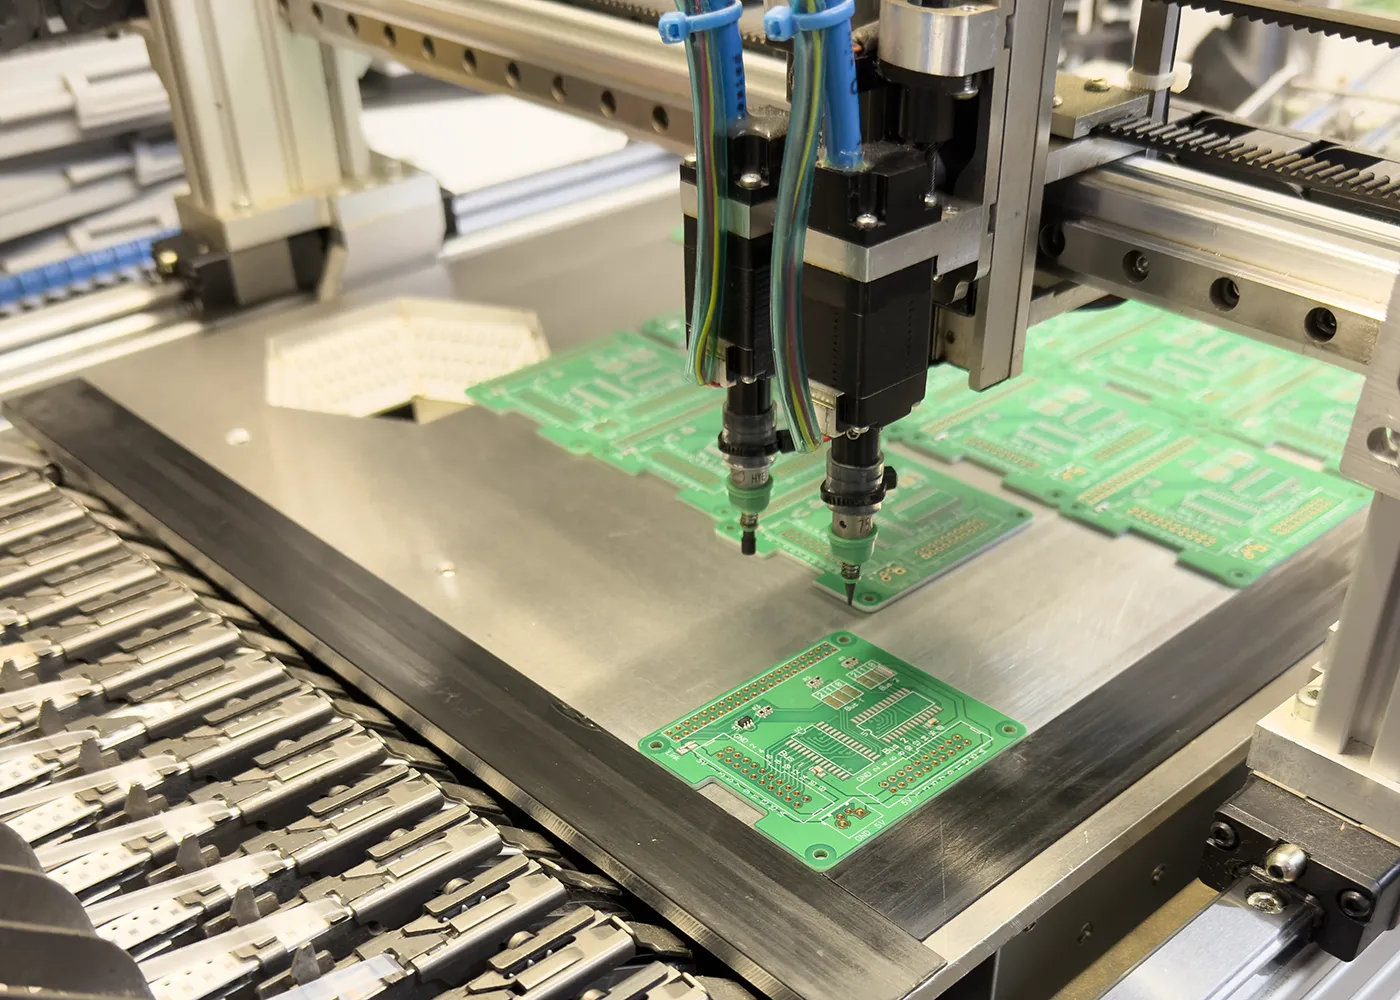
The stepper motor and new nozzle was reinstalled onto the Pick and Place machine and we then used the manual control section of the software to find the new placement height. The new nozzle assemblies are approx 13mm longer than the old ones so an offset value was added to the software to avoid the need to update all the board files with new placement heights.
Nozzles used:
| Size | Inside Diameter | Outside Diameter | Suitable for: |
|---|---|---|---|
| JUKI RS-1 7503 | 0.6mm | 0.95mm | Medium rectangular passives (0805, 1206) and small transistors/diodes like SOT-23. |
| JUKI RS-1 7505 | 1.7mm | 3.5mm | Larger square or rectangular chips, small SOP/QFN packages |
First Run
With the new nozzles installed and the upgraded software running, we started to build a batch of our Raspberry Pi IO Pi Plus boards which use a mixture of 0805, SOT-6, 1206 parts on the smaller nozzle and 28-SOIC IC using the larger size.
We had to make some slight height adjustments for the 28-SOIC package but overall everything was picked and placed without any issues.
Downloads
You can find a copy of the software on our GitHub repository at github.com/briandorey/DiyPickandPlaceSoftware-V3-2026.

Comments