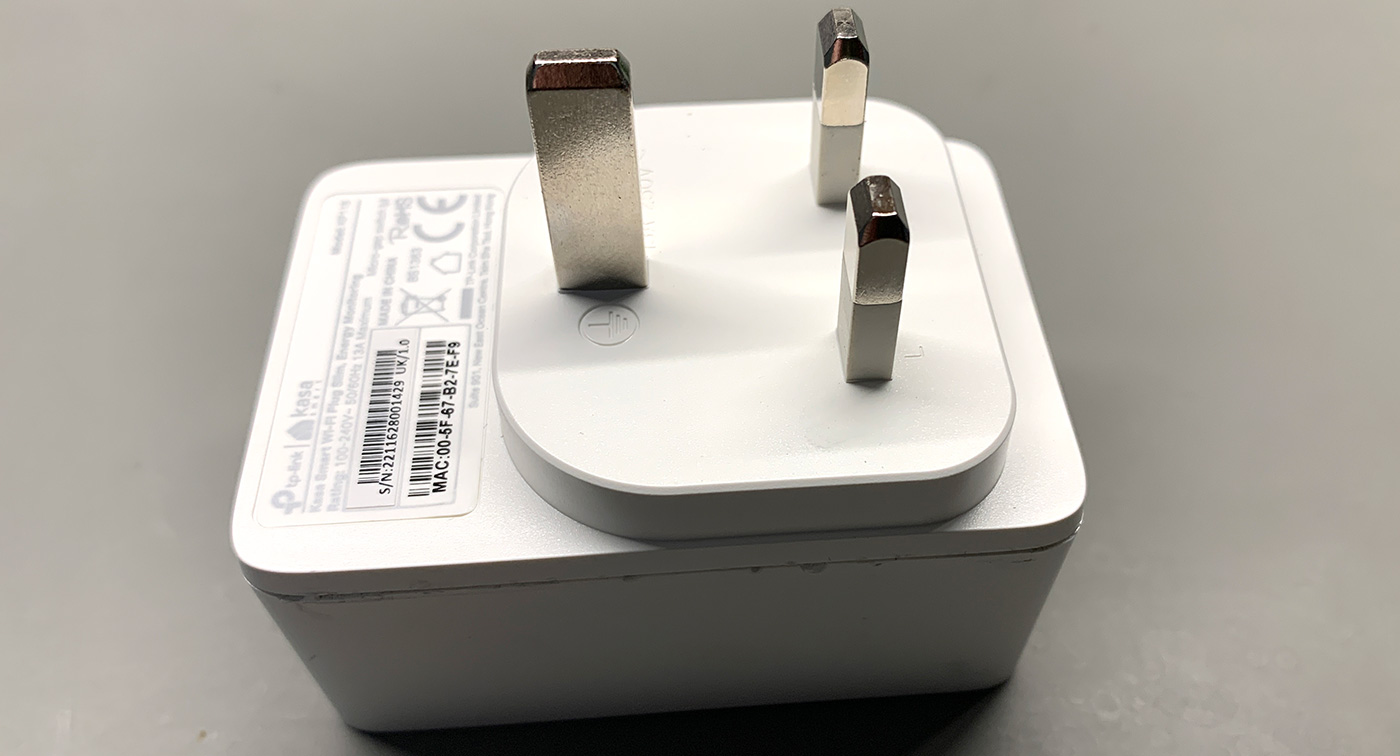
For the past few months, I have been using a TP-Link Kasa Smart KP115 WiFi Plug with energy monitoring to control the mains power for my Samsung TV and Sony soundbar and sub-woofer.
I only watch a couple of hours of TV every day, so for over 22 hours each day, the TV and soundbar are on standby.
To reduce the power consumption when the TV is not being used, I was using the TP-Link Kasa Smart plug to turn off the mains supply when it is not in use and the smart plug also disconnects the power after 5 minutes of the TV and soundbar being on standby.
In the past few weeks, the smart plug was showing as being turned off, but the mains power was still being supplied to the TV and soundbar. The internal relay was sticking closed and could only be released by banging the side of the smart plug, which would fix it for a few days and then stick again.
This is the third smart plug which has failed when connected to the TV and soundbar, the previous two models were Samsung Smart Plug GP-WOU019BBDWG which are completely sealed, but the TP-Link KP115 has a small gap in the plastic case which indicated it would be possible to remove the cover to repair it.
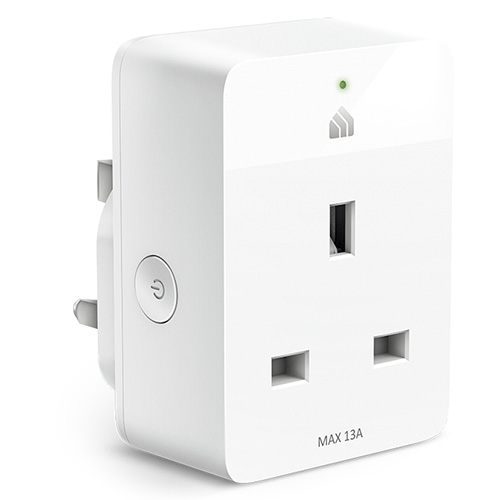
TP-Link Kasa Smart KP115 WiFi Plug with energy monitoring
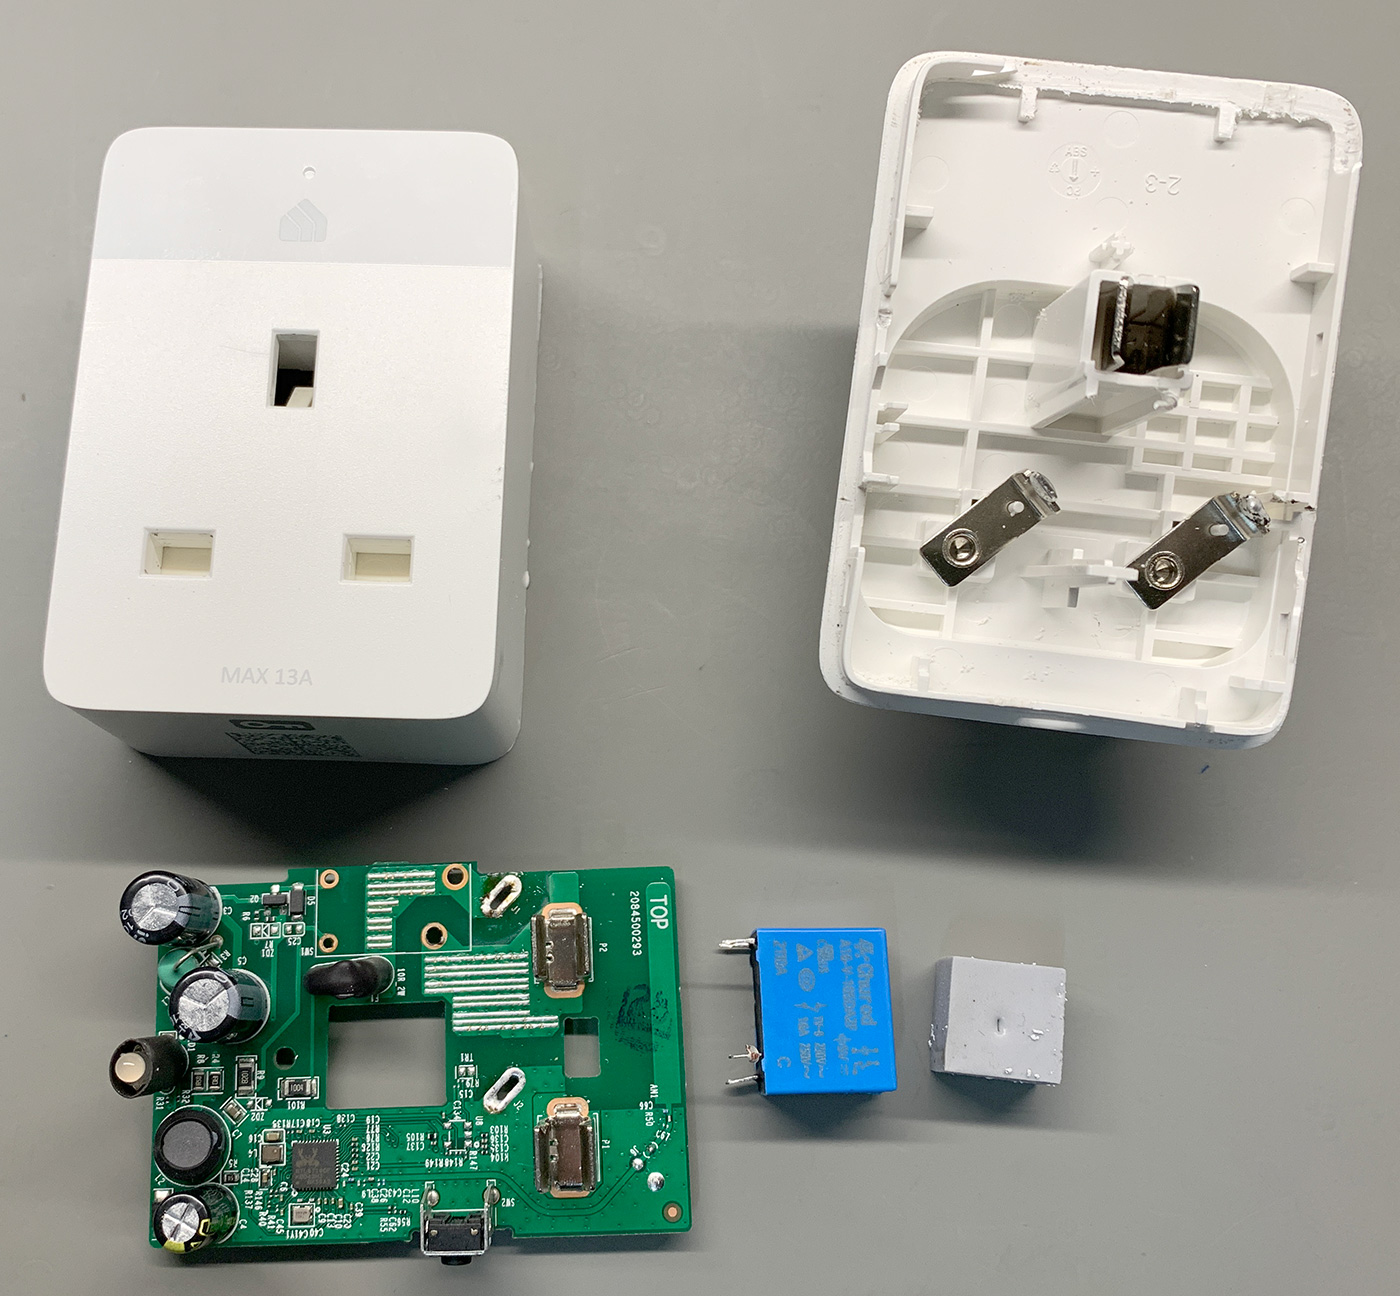
To remove the cover, first, you need to use a thin flat blade to insert into the gap in the case and, working around the edge, gently prise the cover away from the plug pin side. The cover is held in place with several small plastic clips around the base, and once these have been released, the cover will lift away.
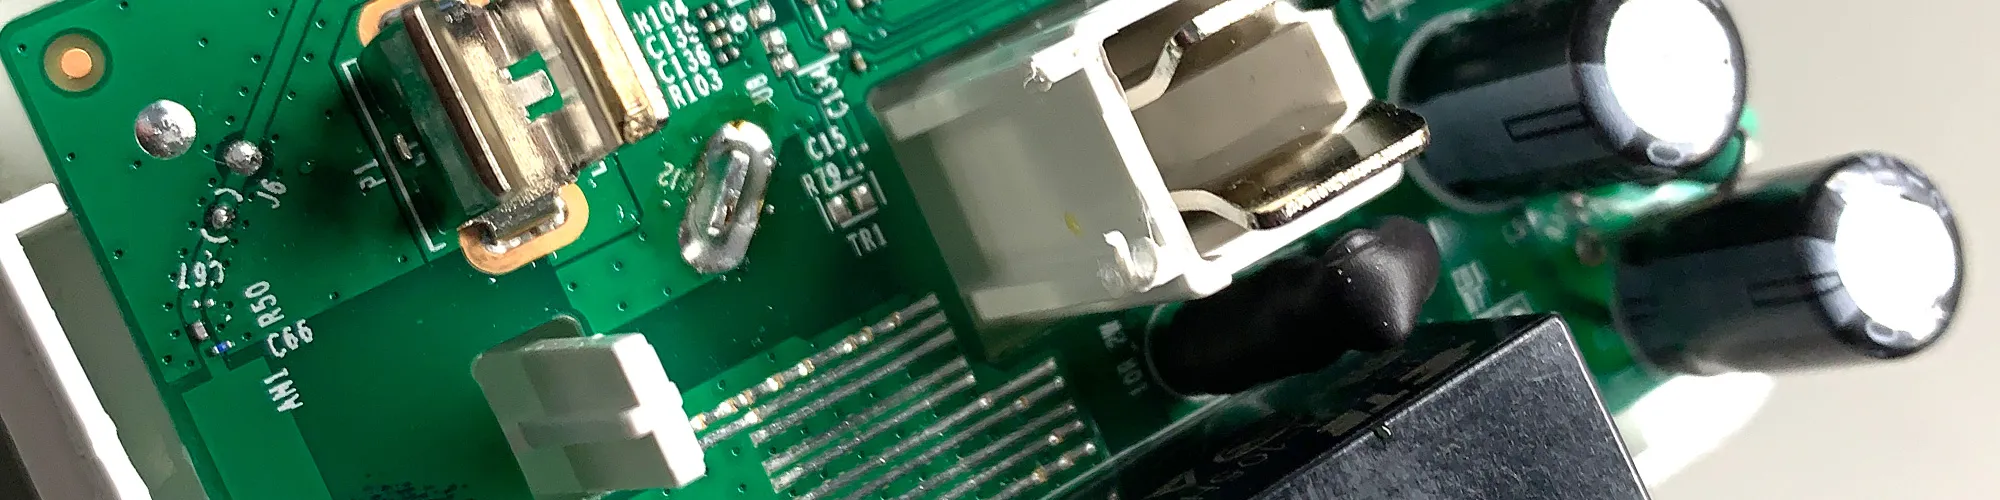
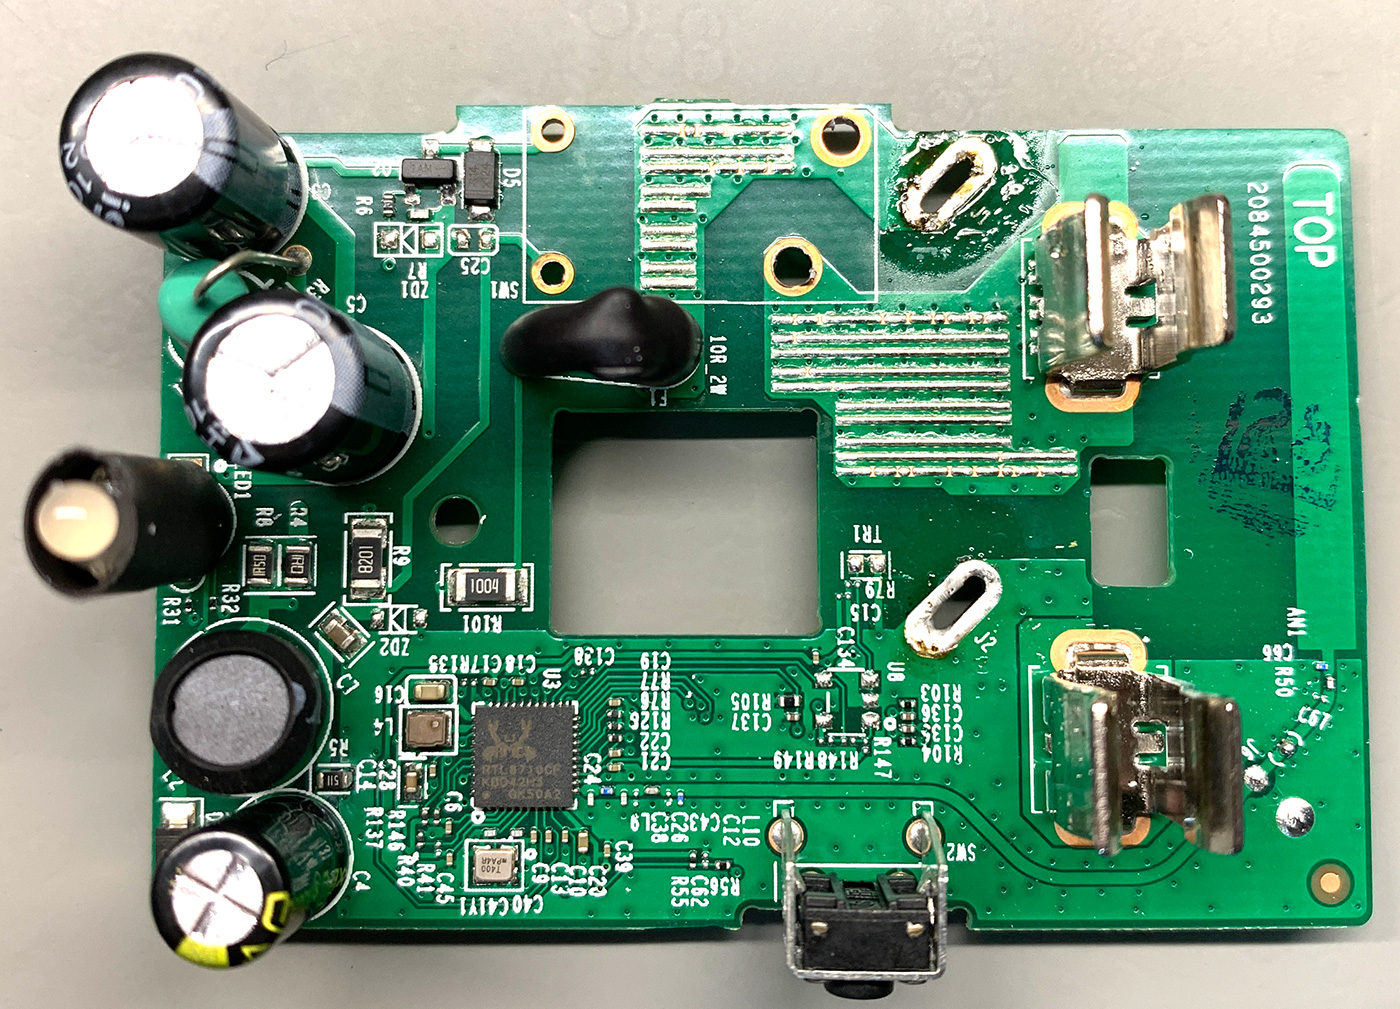
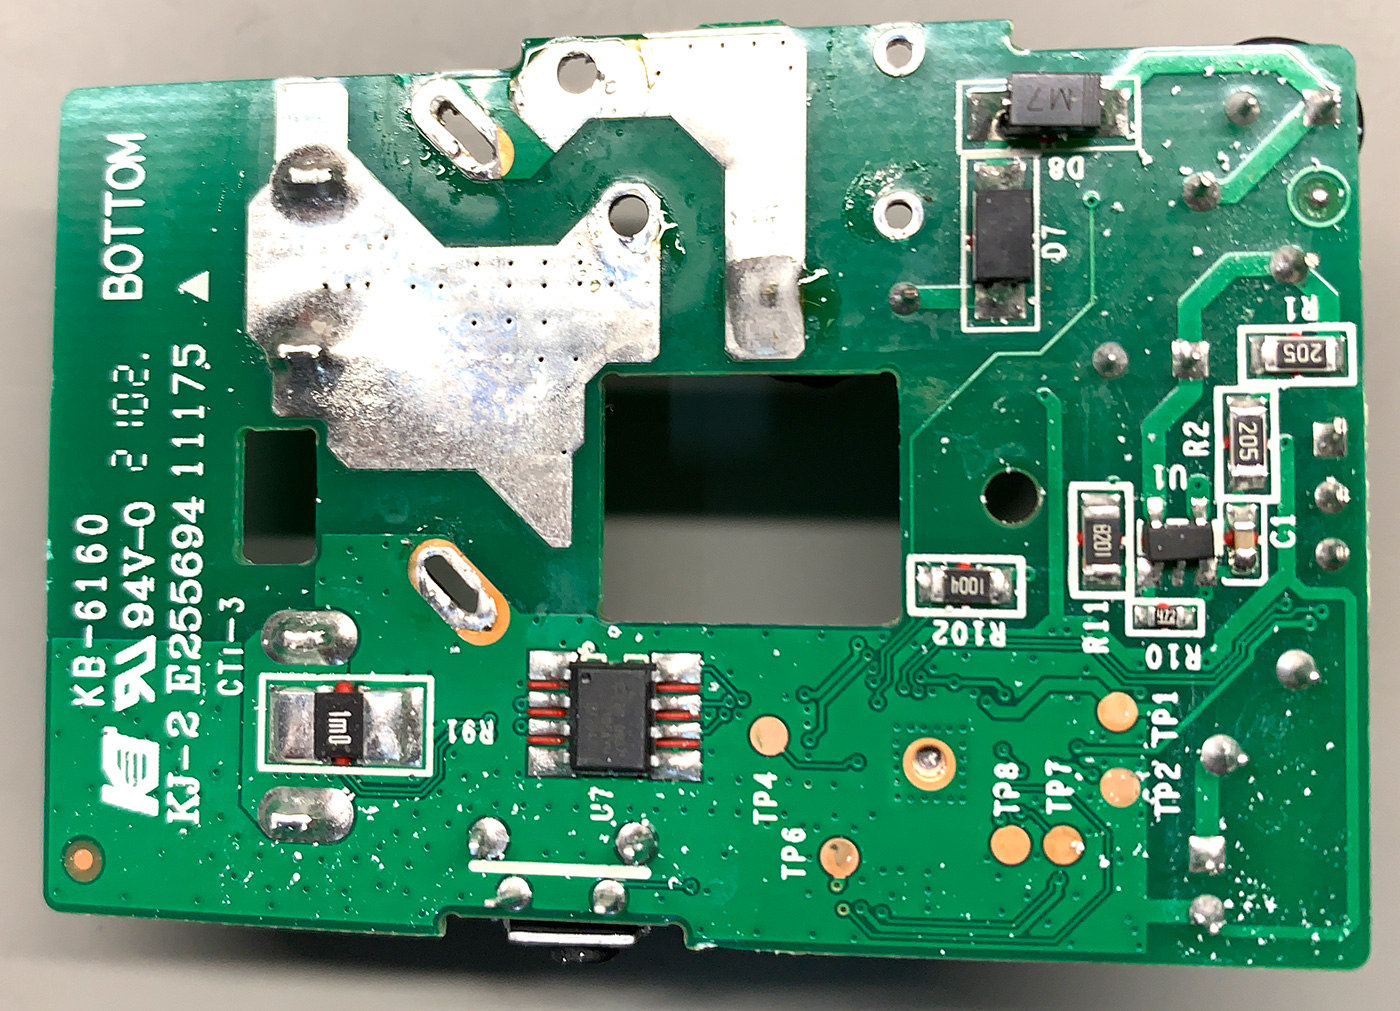
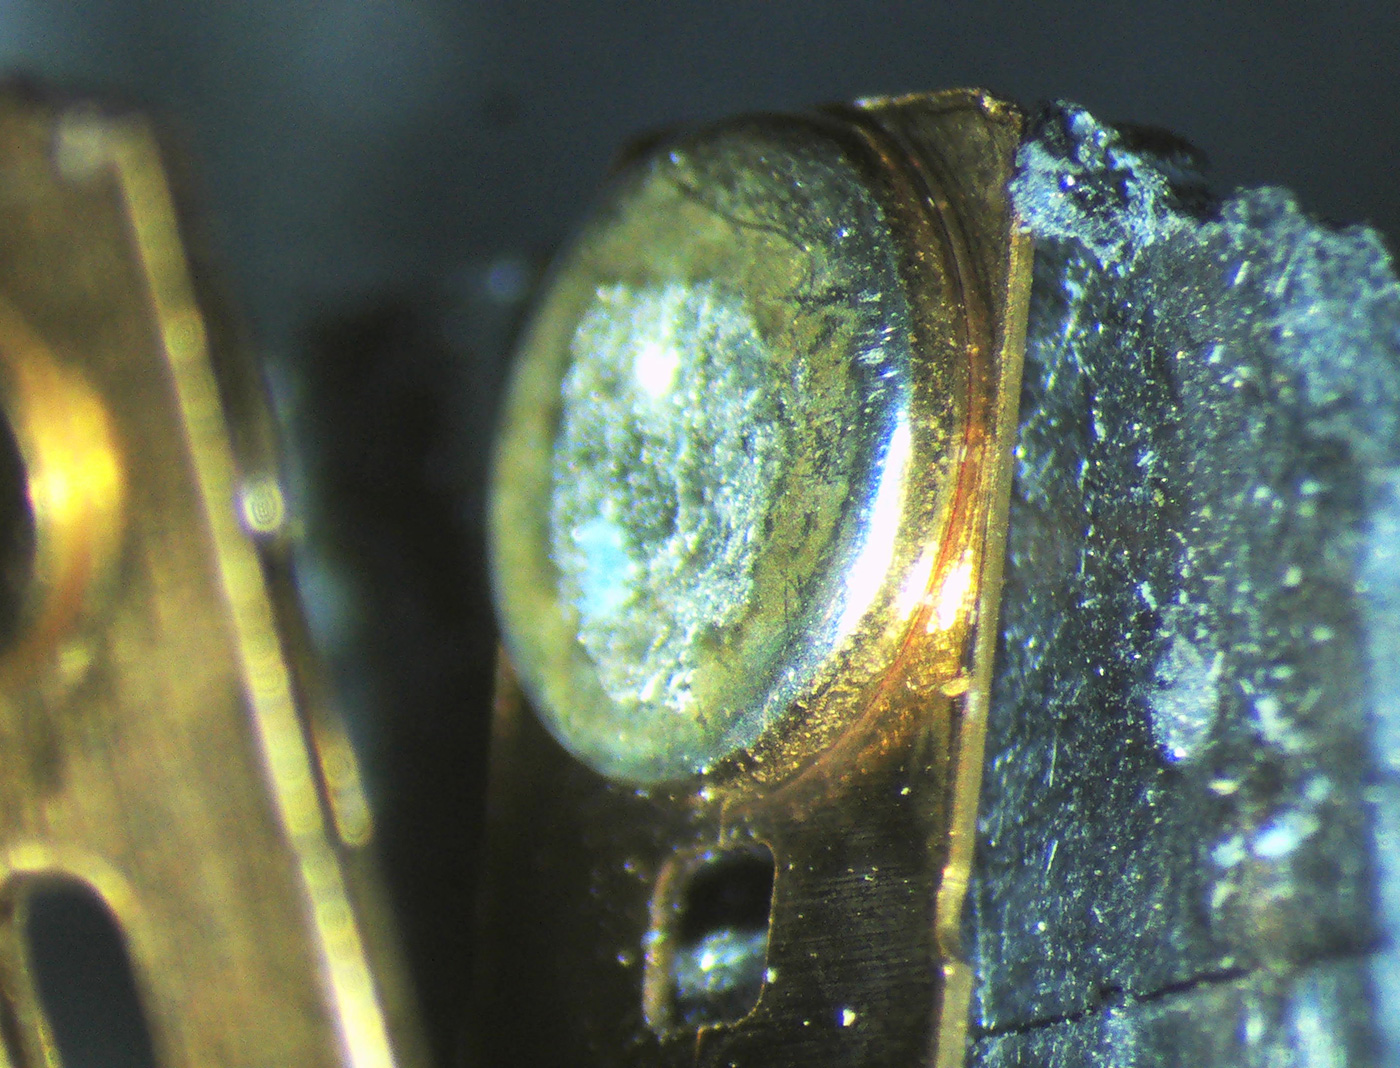
Inside is the main printed circuit board with the live and neutral sockets and the relay on the right side.
Below the relay and earth connection are a pair of diagonal pins, which are the mains input for the board. These need to be heated with a soldering iron to remove the PCB from the case.
Once the board has been removed, this will reveal the bottom of the board, which has a small foam block across the relay contacts, which appears to be insulation across the mains voltage contacts.
Removing the foam pad allowed access to the relay pins, and this was removed with the desoldering iron to clear the holes.
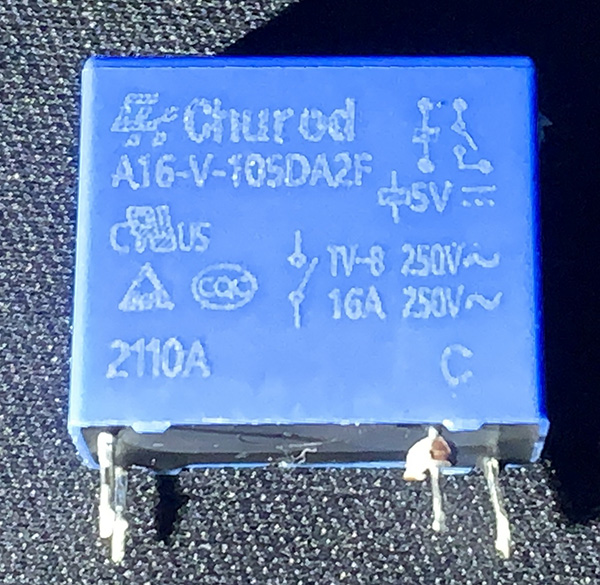
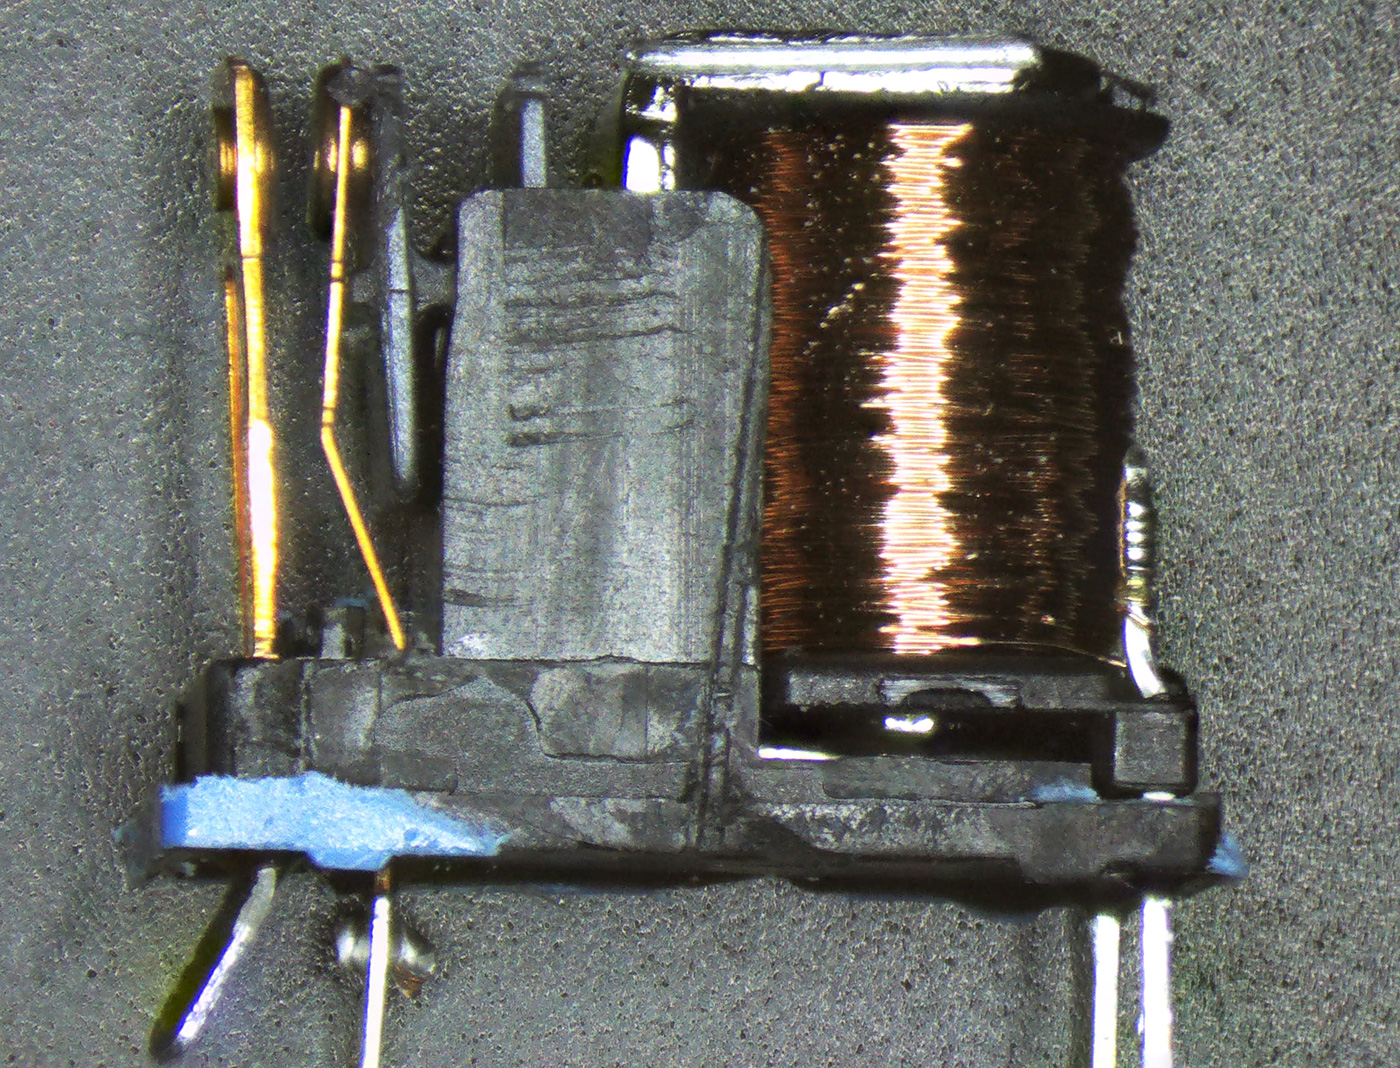
With the relay removed, I could find the model number, a Churod Electronics | A16-V-112DA2F,000. This is an SPST relay with a 12-volt coil. The contacts are rated at 16 Amps which is much higher than the current consumption of the TV and soundbar when in use.
The Churod relays only appear to be sold in quantities of 100 from China, so I looked for an alternative model. The TE Connectivity, 5V dc Coil Relay SPNO, 16A Switching Current PCB Mount Single Pole, 1-2071556-2 closely matched the specifications, and I ordered a replacement from RS Components. The new relay cost £2.09 for a pack of two, so I now have a spare relay.
The new relay was soldered to the board, and the PCB was soldered back onto the mains supply pins.

The cover was clipped back to the base and tested to ensure the new relay was working as expected.


Jon
You replaced a 12v relay with a 5v relay?
Brian
The part number of the relay said it was 12V but the actual relay is a 5V model.
Ian
Interesting article. I have a KP105 which is similarly stuck :-(. Since I need/want to know when my KP1x5 devices are 100%/definitely off I was thinking, specifically for the KP115.... Whether I could create some logic in HA so that it alerts me if a KP115 which is off is still showing amps being consumed. Since I have a faulty KP105 I can't prove this. Did you happen to notice if your KP115 still showed usage/consumption when off but relay stuck?
Brian
Hello Ian,
The smart plug still shows current consumption when the relay should be off so it would be possible to create something in HA to alert when the relay has stuck.
Karl
Great article ! I've had the same issue on a couple of these KP115s.
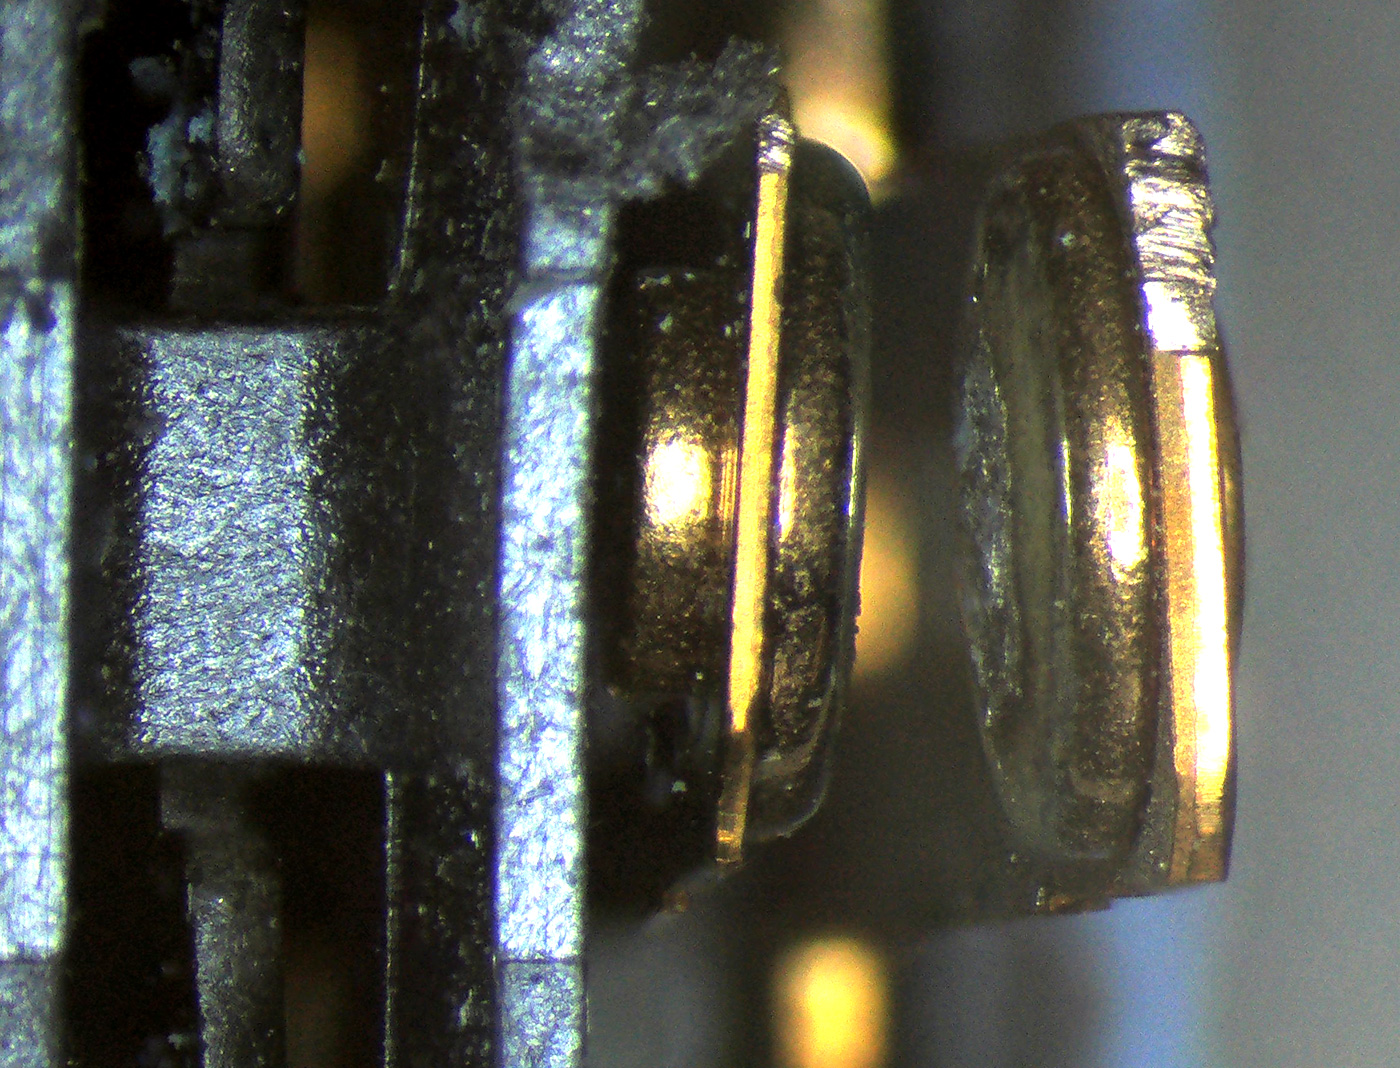
The relay contacts have frozen ON.
I guess I'd like something like the KP115 but with a Solid State Relay. Hopefully less to go wrong on that.
I have found that I can "free" the relay. Operate it a few times, leave it off for a while. But I guess it's going to be some soldering fun at some point.
Kieran
Thanks for this write up, very useful as I am suffering the same problem with one of my plugs. I just wondered, how have the replacement relays lasted, have the contacts welded closed since?
Brian
I have replaced the relay twice since this post. The next time it fails, I am planning to mount a solid state relay in an external box for switching the TV and soundbar
sathish
I had same issue, Thanks for sharing knowledge.
Steve T.
Thanks for sharing this. The relay went dead may be due to the constant arcing due to repetitive on-off. I'm not sure if is worth to add RC circuitry to damp the arcing. I'm going to replace the 5V relay for my first attempt.
Ruaraidh McDonald-Walker
Great article!! Ordered from RS, all desoldered, fix on the way!
Cheers!
Paul Collis
Just to note, the internals of the Tapo P110 look exactly the same so the Kasa Version (Still Tapo) which is more expensive, I recently ordered the Churod relays, pack of 10 from Aliexpress and fixed the plug (Before reading the article) unfortunatley 4 weeks later the same issue has arisen on the same plug, I wonder if you guys have had the same experience with the RS relays, no doubt they are still made in China.
Out of interest what temp did you use to desolder the L and N terminals and with what tip, i dont have a desolder gun and it was a nightmare trying to desolder them as they are so big with so much solder on them, thanks indeed.
Brian
I have had a few of the RS relays fail as well.
I dont know the temp of the soldering iron, i use a metcal soldering station with a 2mm tip.
Paul Collis
Thanks Brian, I think I will need to watch a video on perhaps the best way to desolder larger joints. I turned it up to 490 it still didn't help, and I was concerned it would damage other components, luckily it didn't.
So looks like I will just have to try another relay, I think the contacts in the relay are of low quality, and there is a carbon build up the occurs, I can hear them switching ok.
Bruno
Link to the specs of the Churod relays below if anyone is interested.
https://www.churodamericas.com/wp-content/uploads/2021/06/a16-series.pdf
I've had two Tapo plugs fail now, a P100 and a P110. Both used in the same location for some low power LED's (pulling 23w as measured by the P110) and interestingly enough it is switched on and off multiple times a day which seems to be the achilles heal for these relays.
The Tapo units have a 2yr warranty just in case people didn't know. TP-Link have replaced both my faulty ones, the first I had to pay the postage to send the original unit back, but the second I said I wasn't willing to pay the postage and for them to send me a delivery label. They didn't send a delivery label but said I didn't have to send the unit back, they would just send me a new one.
I'm going to repair the one I have kept and see how it goes. I'm wondering if there is a better quality relay or something that uses a different contact material that would work better?
Martin
Maybe a couple of 9Amp 'Mains Inrush Current Limiters' (varistors), wired in parrallel, would help with the arching and give longevity to the Smart Plug ... you'd cut the PCB track between the live out and the relay switched connection ... and solder them across the cut ...
https://www.mouser.co.uk/ProductDetail/EPCOS-TDK/B57234S0229M000?qs=%2FsLciWRBLmC%252BVJxiRBi2zw%3D%3D
Brian
Thank you for the suggestion, I will order some and see if they help.
Chris
Thanks very much for this Brian, very good instructions, you saved another little bit of landfill & now I have a working smart plug again.
ferg
Hmm, Just had the same stuck relay issue. I tapped each side of the Tapo p110 firmly against my desk which fixed things; for the moment. However, this is an extremely interesting article, as I expect I will ultimately have to replace my relay.
This failed p110 is one of eight I have around the house; most are left on at all times and are just to measure power consumption. The failed unit switches a pile of IT equipment < 200W on/off a few times a day. I have another switching a 1KW heater on/off a few times a day; no sign of bother from it. I suspect the IT equipment requires a snubber, I wonder if their one built into the p110? The lack of a snubber would explain the contact damage on a relay rated for 16A.
Also, a note to those considering switching to a SSD. I had initially used them around my house as I did not want these issues with relays and contacts :- ) However, I found that SSDs came with built-in snubbers which leaked rather a lot of current. The leakage was enough to power low-power items such as LED bulbs. ie they never turned off or flashed intermittently. Beware; check the leakage current.
Roger
While investigating this issue I found a video from August 2023 about dismantling a UK Tapo P100. In that video the original relay is an Omron G5CA-1A-E 5VDC coil. I wondered if they'd improved the quality of the relay due to the 'sticking' issue. The dismantling video wasn't about the 'sticking' relay issue, but they were just dismantling one to see if there were any options for modification to use as a general wifi controlled relay.