In September 2019 we purchased a Brunel BMSZ trinocular stereomicroscope to use with our projects.
We wanted to be able to take digital stills and record video using the microscope and at the time we purchase the DSLR adapter which had a 2x magnification, so the image was much more cropped than the eyepieces when using our Canon DSLR cameras.
We looked at a lot of different commercial USB microscope cameras but most of the lower-end models have extremely low frame rates and image quality and the higher-end cameras cost over £600 as we will not be using them all the time we did not want to spend too much.
In 2020, Raspberry Pi released the Raspberry Pi High-Quality Camera which is a 12.3 megapixel Sony IMX477 sensor, 7.9mm diagonal image size, and back-illuminated sensor architecture, with adjustable back focus and support for C- and CS-mount lenses via a metal mounting bracket.
We ordered the camera module from The Pi Hut and planned to use a Raspberry Pi Zero or the larger Raspberry Pi model 4 to be able to stream the live video feed to OBS on our recording/streaming computer.
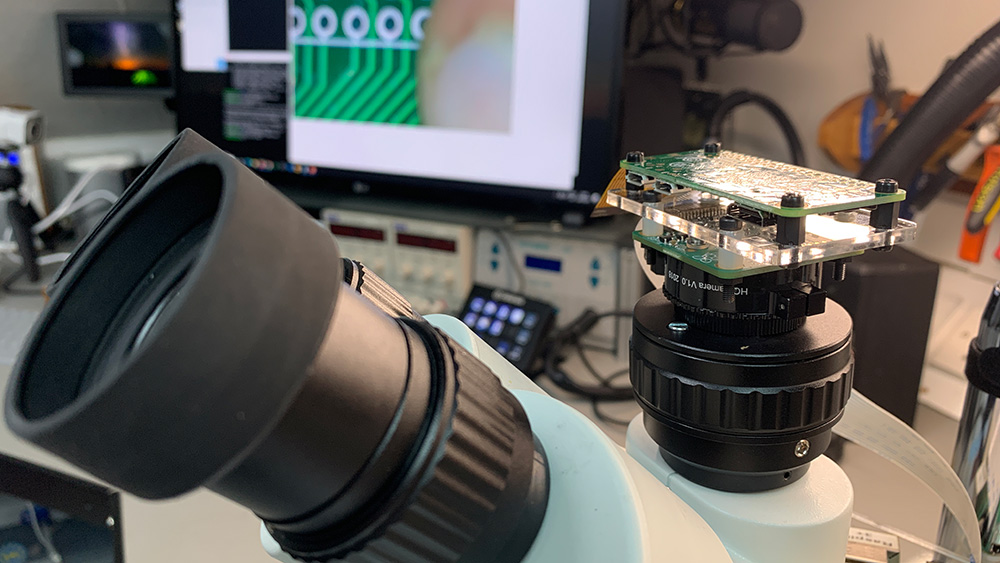
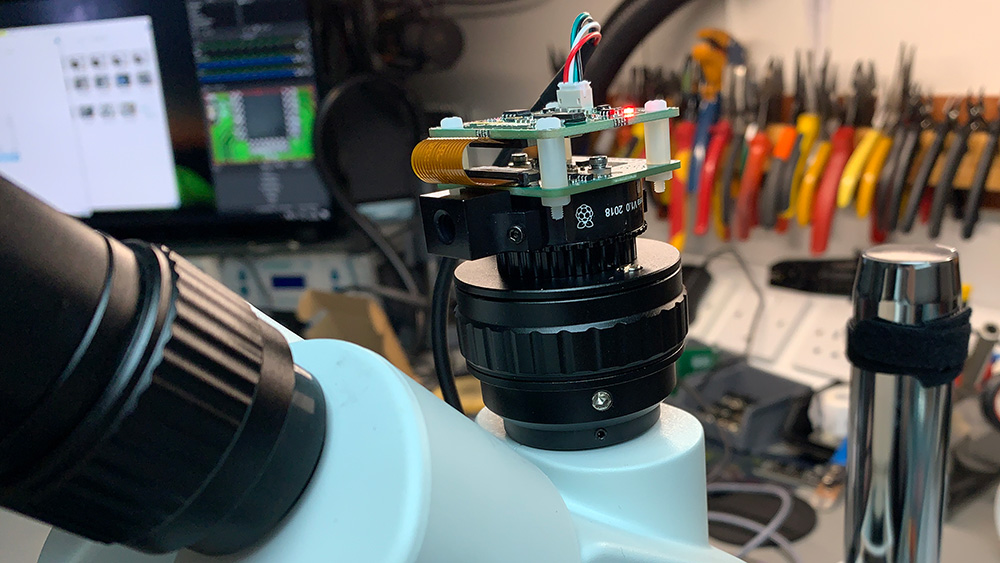
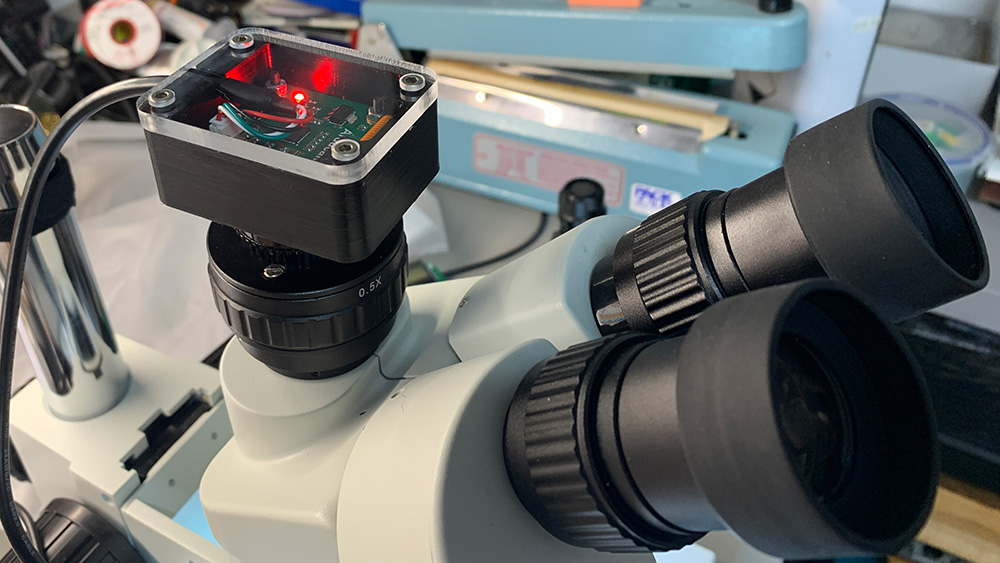
Brunel Microscopes sell an adapter for connecting a CCTV camera to the microscope for £53.33 and this has a 0.5x magnification which gives a wider field of view to the small C-mount camera sensor.
We ordered the adapter which is made of metal and has a built-in focusing ring to match the camera sensor to the same focus as the eyepieces.
Raspberry Pi Streaming Failure.
After spending several frustrating days trying to get the camera and Raspberry Pi to stream video, we found that even at the lowest resolutions there was a several-second delay and extremely low frame rates which made it unusable for recording or streaming.
Searching online for a solution resulted in hundreds of posts with people with the same issues and so we had to abandon the Raspberry Pi plan and look for other options.
Arducam CSI-USB UVC Camera Adapter
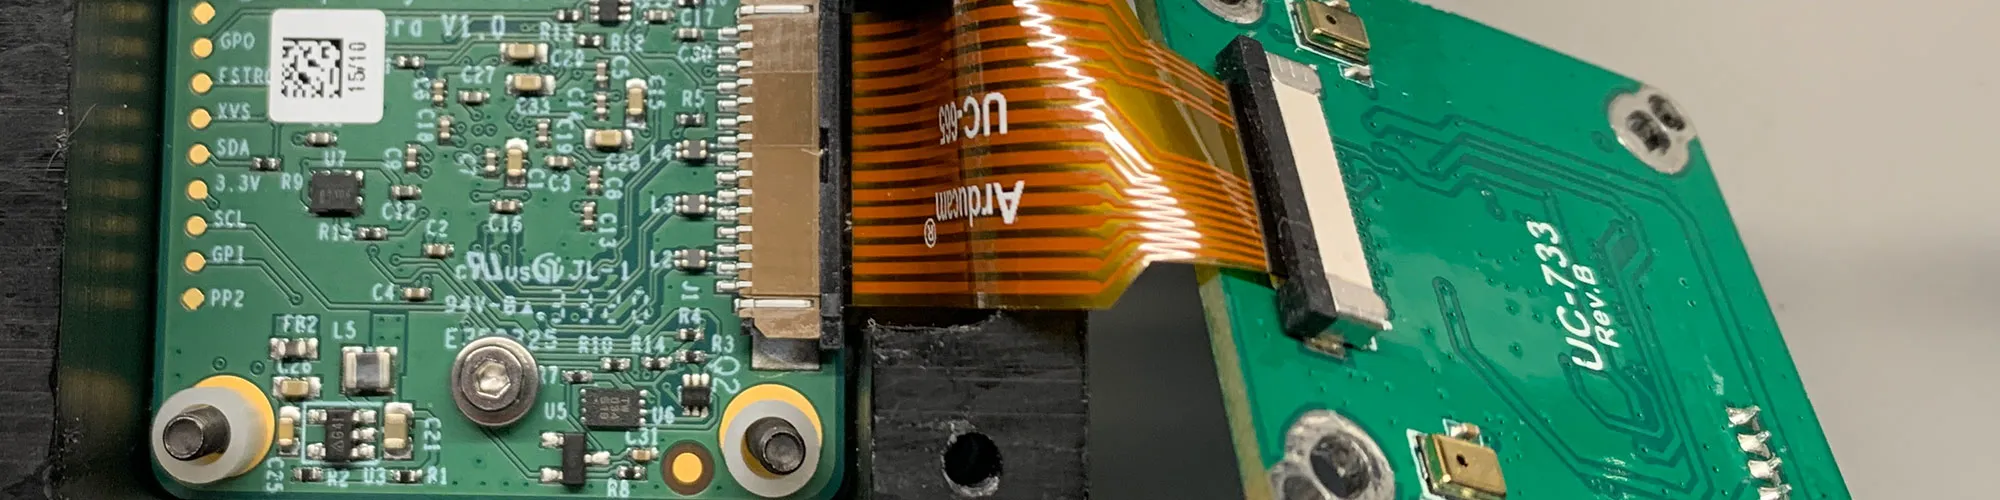
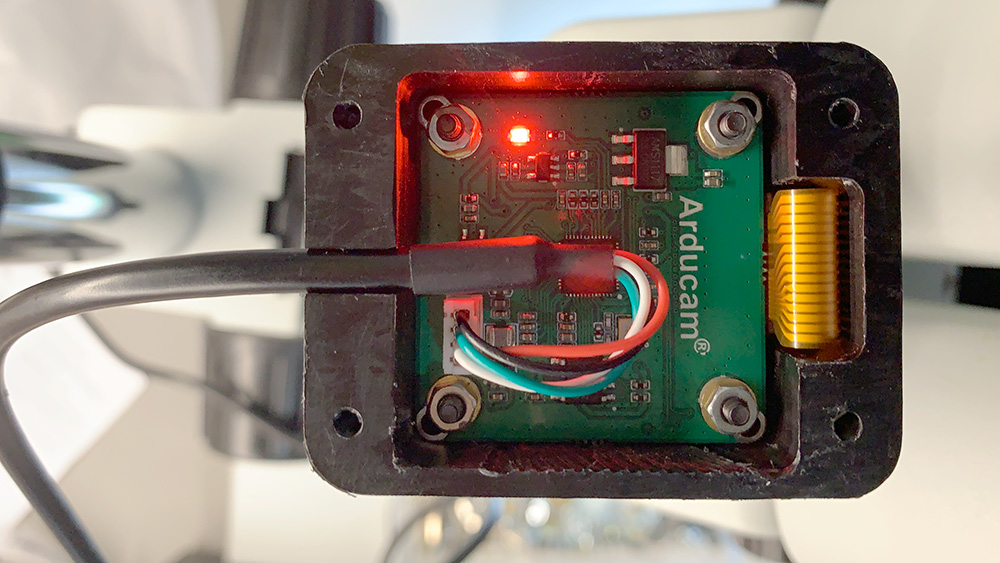
We found a company called ArduCam who makes a range of camera modules and USB interface boards and they sell an interface called “Arducam IMX477 UVC Camera Adapter Board for 12MP Raspberry Pi HQ Camera” I was able to find the board in stock in the USA on Amazon and it arrived a week later.
This adapter board allows you to use the 12MP Raspberry Pi HQ Camera via USB and it is recognised as a webcam with the following resolutions and frame rates.
Still resolution
- 4056(H) x 3040(V);
MJPG Video
- 10fps @ 4056x3040
- 20fps @4K 3840x2160
- 30fps @ 2592x1944/2560x1440
- 60fps @ 1080P
- 100fps @ 720P
The board measures 38mmx38mm, which is the same size as the IMX477 HQ camera board, and ships with a connecting cable and mounting screws.
Recording videos and still images
We tested the USB adapter and camera module on the microscope and found the image was wider than the DSLR adapter but still only showed around a third of the eyepiece view. To improve this, we have ordered a 0.5x lens adapter which mounts below the main lens which will give a wider view to the camera and then add 20x eyepieces to replace the current 10x to restore the field of view.
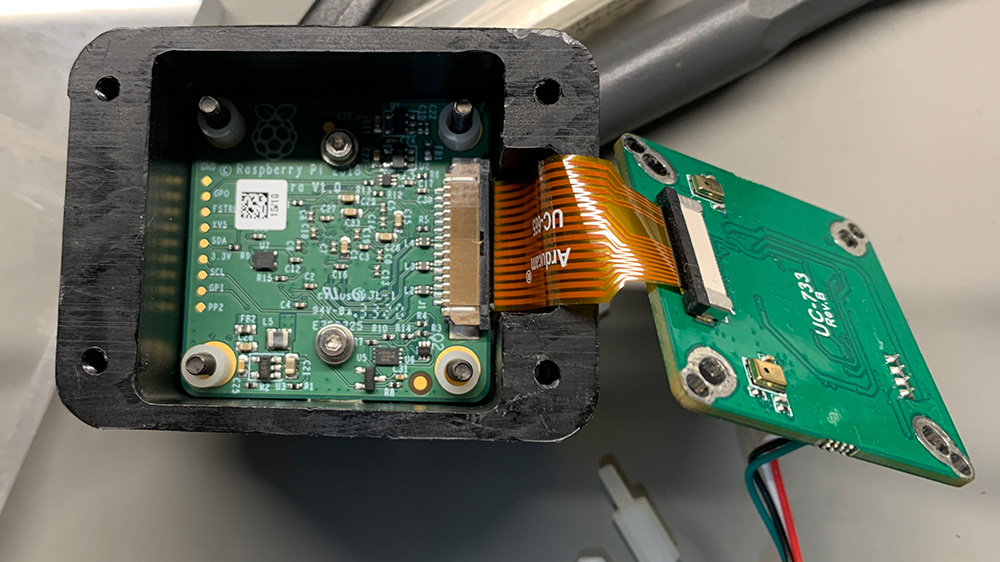
To protect the Raspberry Pi camera module and USB board we created an enclosure using a sheet of 20mm acetal sheet and this was machined on the CNC mill to hollow the centre and add mounting holes. For the top, we used some clear acrylic sheets so we can see the led on the top of the board.
The video below shows two small IC dies we purchased, shown at the different zoom levels on the microscope recorded at the 4K 20fps setting. There is some horizontal tearing when moving the item under the lens, but this is better at higher frame rates and 1080P resolution.
We currently have a flicker issue with the microscope's LED light ring, so we need to make a new higher-frequency dimmer circuit for the next project.
Cost of Parts
Raspberry Pi High-Quality Camera £49.50
Arducam CSI-USB UVC Camera Adapter £43.66
CCTV Adapter £74 including shipping.
x0.5 Additional Objective Lens £45
x20 Widefield Eyepieces £46.67
Total Cost: £258.83


Illya
Pretty cool! Would love to build this myself sometime soon. Is there a reason why you need the 20x eyepieces or are they just for extra magnification?
Brian
Illya, I added the 20x eyepieces to increase the magnification after adding the wider main lens for the camera
fred
like your rig. i have a similar set up. Have you seen Bill Williams (billwilliams 1952) on github. he made a GUI for pi . called microVIEW. its also optimized for a touchscreen with sliders. also has a link to print an enclosure with c-mount threads.
John
Where did you source the 20x lens from? Thanks
Brian
I ordered them from brunelmicroscopessecure.co.uk
John
Thanks. Are there any lenses in the camera optical path besides the 0.5x lens and the microscope objectives?
Brian
It only has the 0.5x lens and the microscope objectives