
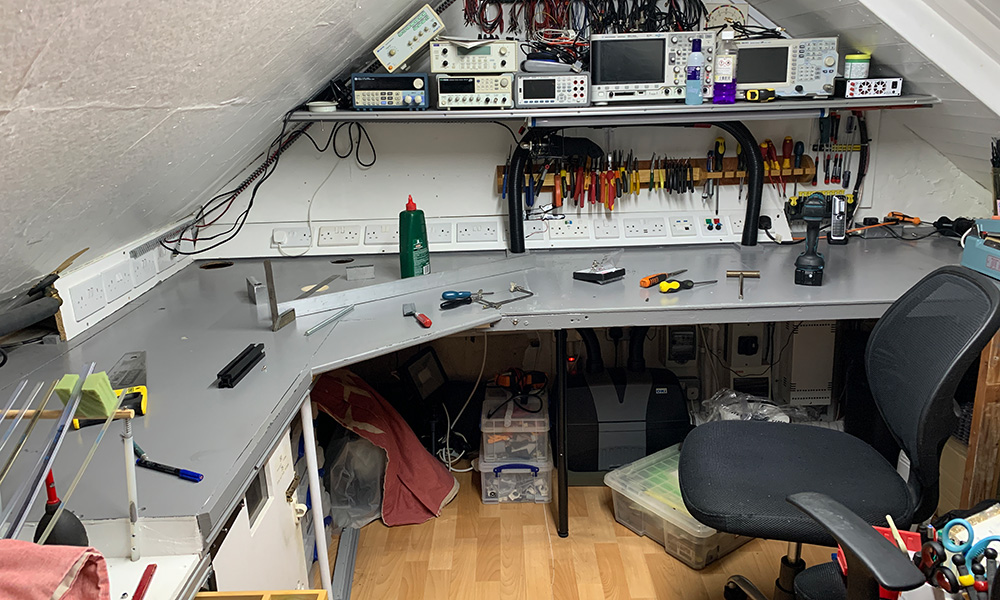
On our workbench, we had a small ESD mat to avoid any static discharge issues which could damage the electronics we work on. The mat only covered the central portion of the bench and areas on each side only had a painted finish. The edges of the mat also had a problem with curling up despite several attempts to glue the mat down to the bench using different glues and double-sided tapes.
On the floor, we had a vinyl flooring surface and we decided to purchase an ESD Floor Mat measuring 2000 x 1500mm from Somerset Solders. This is connected to a central earthing point via a high-value resistor to limit the current.
For the bench, we purchased a Multicomp Antistatic Mat measuring 1.2m x 3.3m which we could cut to fit the bench.
Removing all the test equipment and other tools from the bench took several hours and once the bench was cleaned, we installed wide double-sided tape around the edges and across the centre sections to stop the new matting from moving.
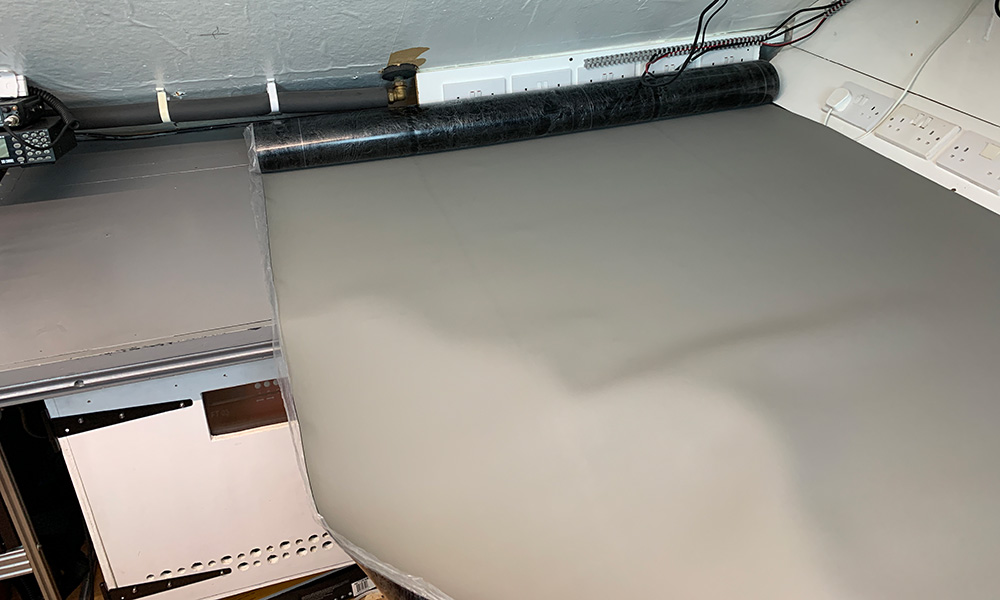
The mat was initially cut roughly to size and once it was stuck to the workbench surface, we trimmed the edges to fit. The matting was not wide enough to cover the entire bench in one piece and so we had a small section on the side bench with a join. We found that superglue worked well to hold the edges down and provide a smooth join.
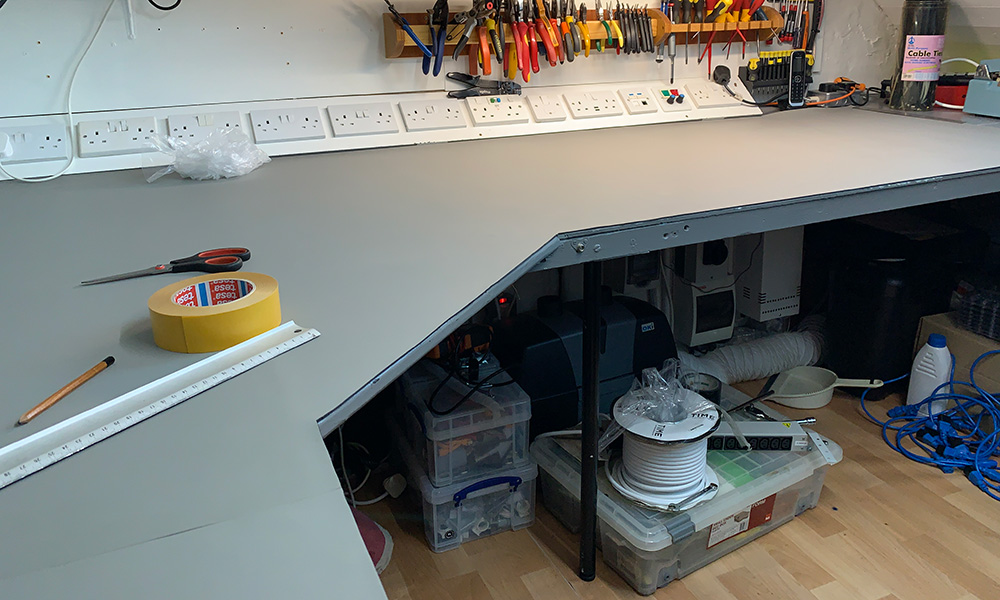
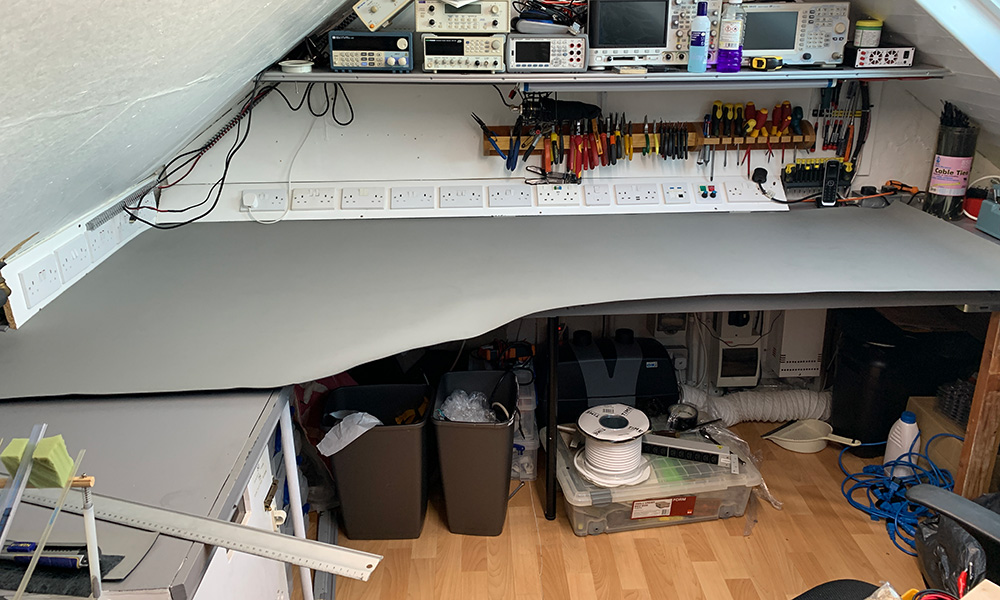
To hold the front edge of the ESD mat down and provide a smooth edge we used several pieces of edging strip from Screwfix which are designed to be used on kitchen worktops. The aluminium strip has a small, rounded lip on the top which was used to hold the edge of the ESD mat down securely.
We also added ESD studs on the edges which are all connected to a common earthing point via current limiting resistors.
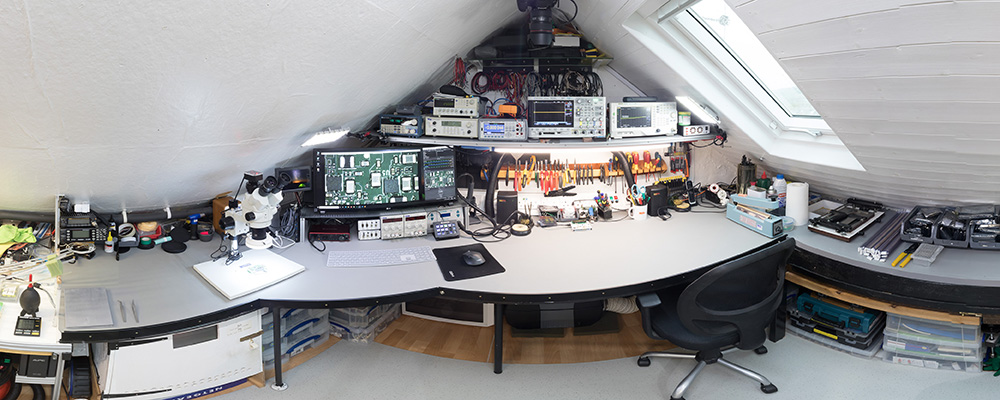
View a 360 panoramic which you can scroll and zoom.


ashikur
Having an issue with your floor mat each time you use it? Does your floor mat slide each time you are using it? Worry less; we have your topics covered here. Vinyl floor is the most affordable and most durable flooring solution today used by many people. They are available in two types; vinyl sheet flooring and vinyl tiles. How to keep floor mats from sliding on vinyl floor general. Keep reading.
https://oursafetysecurity.com/how-to-keep-floor-mats-from-sliding-on-vinyl-floor/