Despite Google's claims that they would provide API access to the Google Nest Thermostats back in 2015 when we purchased the 3rd gen thermostat, over seven years later it still isn’t possible to access the hot water data from the thermostat via their APIs.
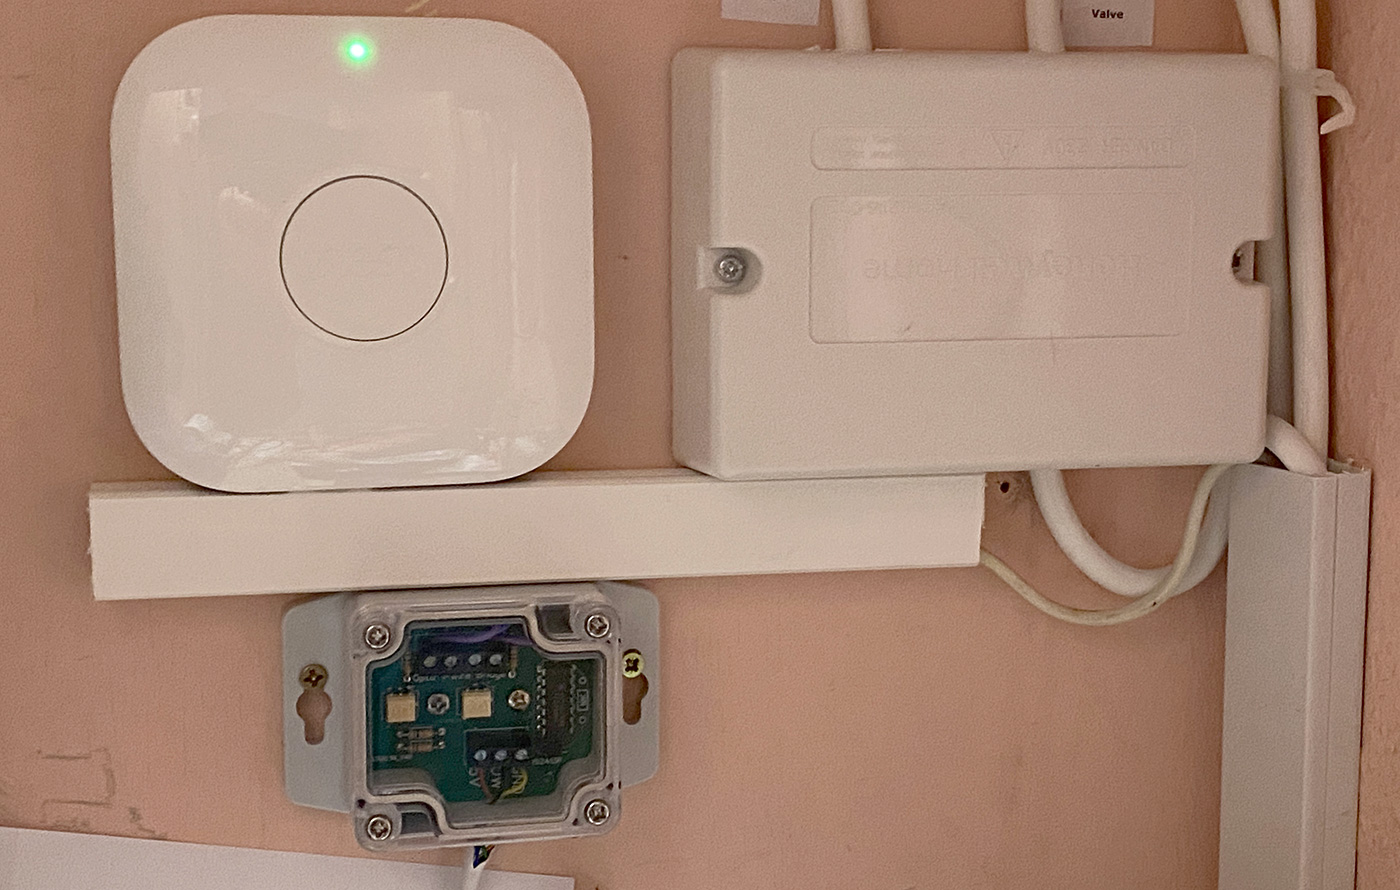
After years of manually adding the daily heating and hot water usage into our home logger website, we decided to automate the data using Home Assistant and monitor the switching times and usage via the internal relays in the Nest Heat Link box.
The Circuit
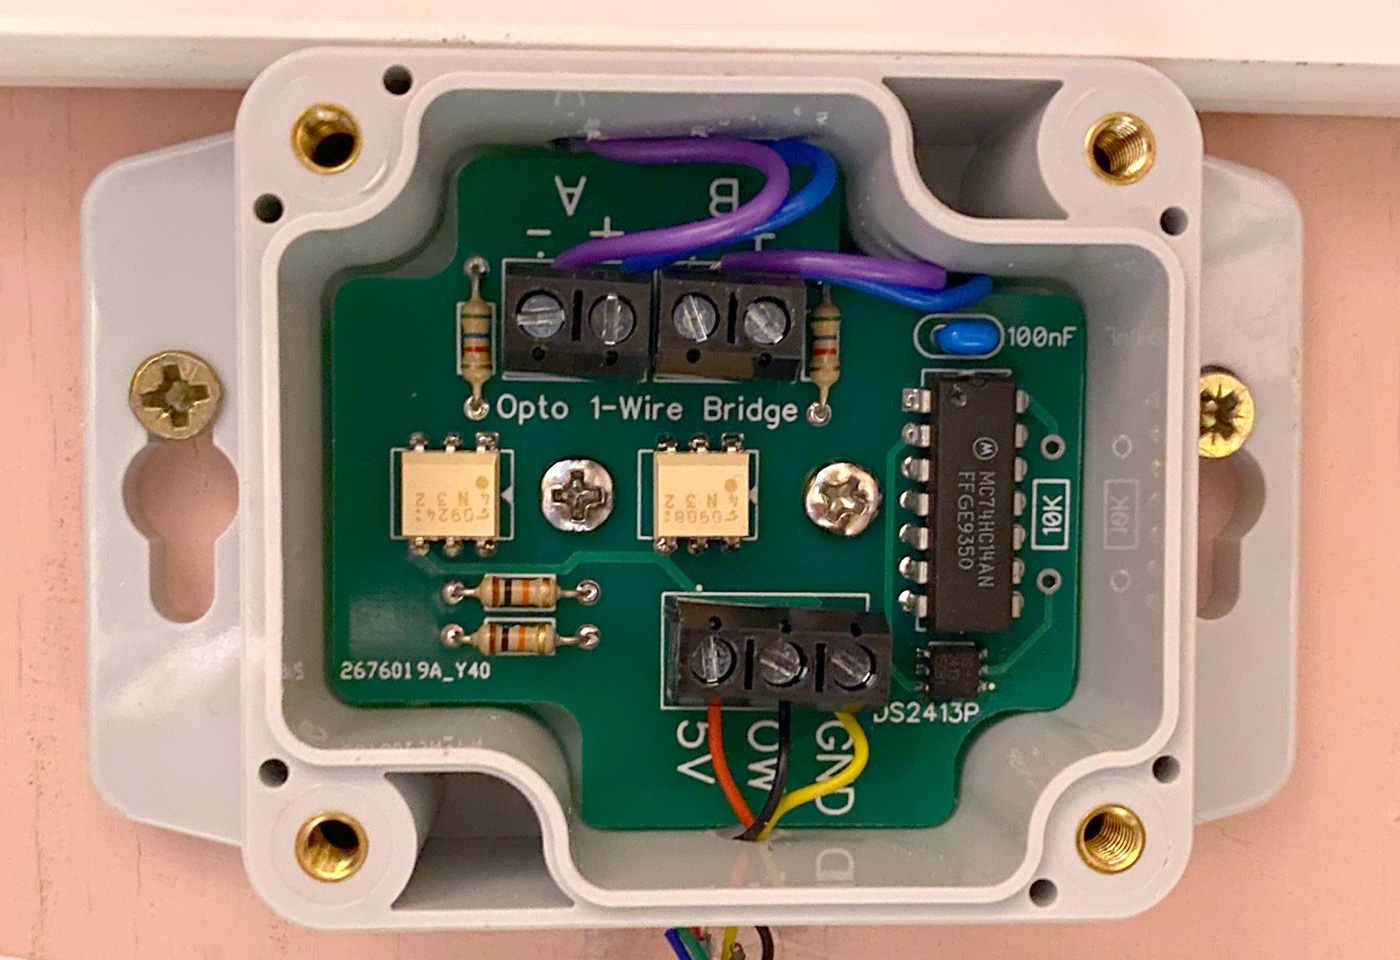
The Nest Heat Link has a pair of 12-volt relays internally and we decided to use a pair of opto-isolators to provide isolation from the circuit and a DS2413P+ 1-wire binary sensor to monitor the status. As the output from the optocoupler would be inverted we used an SN74HC14N hex inverter to invert the signal so the output from the 1-wire sensor shows 0 when the input is low and 1 when it is high. This connects to our 1-wire network in the house which has several 1-wire temperate sensors for the hot water system.
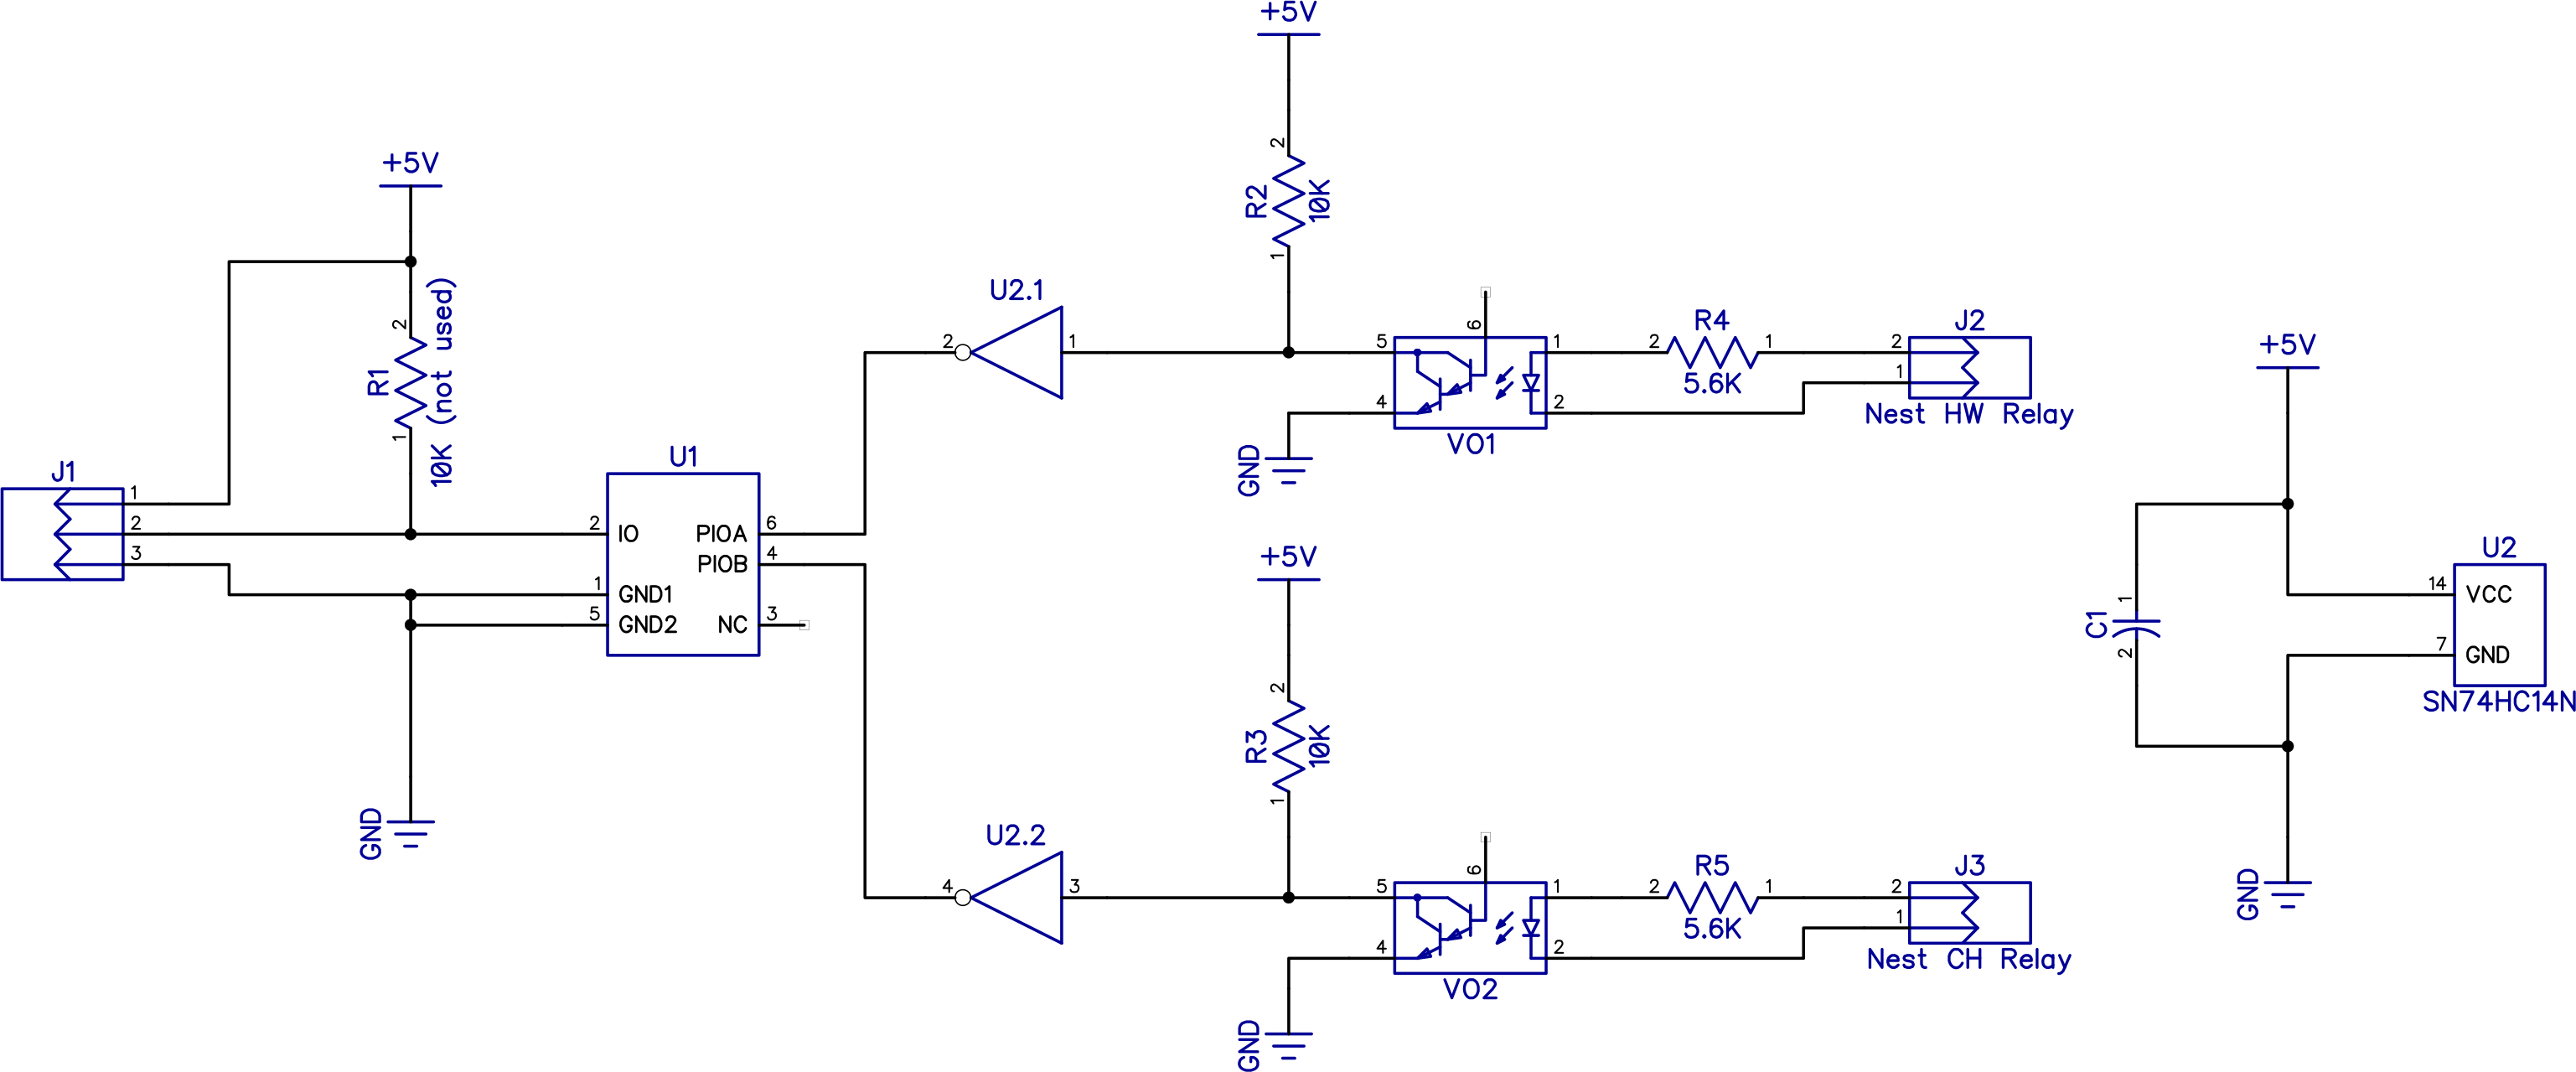
Rather than use all surface mount components we decided to use some of the many through-hole components we already have for the circuit.
- Fairchild Semiconductor 4N32 opto-isolators
- Maxim Integrated DS2413P+ 1-Wire Dual Channel Addressable Switch
- Texas Instruments SN74HC14N Hex Inverters with Schmitt-Trigger Inputs
- 10K and 5K6 resistors
- 100nf Capacitor
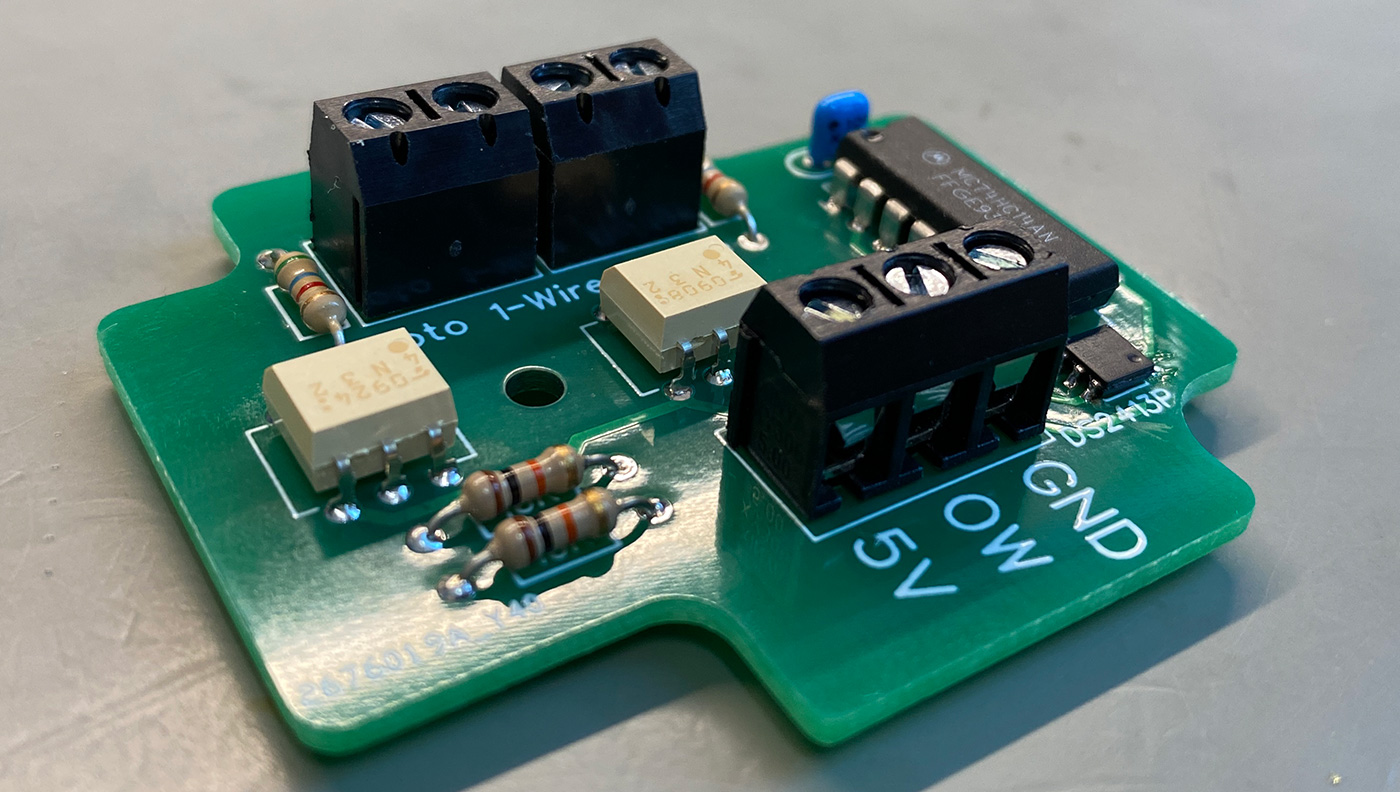
The PCB was designed to fit into a MULTICOMP PRO MC001103 Plastic Enclosure which is wall mountable and measures 35 mm, 64 mm, 58 mm from Farnell.
The design files in Diptrace format for this project can be downloaded from GitHub at https://github.com/briandorey/Nest-to-1-wire-bridge
1-Wire Data Processing to Home Assistant
The 1-wire network connects to a 1 Wire Pi Plus and Arduino Uno which parses the 1-wire data and then sends this as a serial JSON stream to our Linux server. A python script on the server extracts the separate sensor values and posts these to our MQTT broker.
Home Assistant uses the MQTT data as Binary Sensors using the following code:
binary_sensor:
    - state_topic: "/home/heating/centralheating"
      name: 'NestCentralHeating'
      payload_on: "1"
      payload_off: "0"

    - state_topic: "/home/heating/hotwater"
      name: 'NestHotWater'
      payload_on: "1"
      payload_off: "0"
We also use the History Stats component to create a daily usage value with the following code:
- platform: history_stats
  name: NestCentralHeatingRunTime
  entity_id: binary_sensor.nestcentralheating
  state: "on"
  type: time
  start: "{{ now().replace(hour=0, minute=0, second=0) }}"
  end: "{{ now() }}"

- platform: history_stats
  name: NestHotWaterRunTime
  entity_id: binary_sensor.nesthotwater
  state: "on"
  type: time
  start: "{{ now().replace(hour=0, minute=0, second=0) }}"
  end: "{{ now() }}"
Arduino Code
The Arduino Uno is used to parse the 1-Wire sensor data and post it via the serial connection to the host computer. The firmware automatically detects any DS18B20 temperature sensors and DS2413P+ switch sensors on the bus and fetches the data from each sensor every 20 seconds. The output is formatted into a JSON stream which is transmitted over the serial connection.
The code can be downloaded from /Nest-to-1-wire-bridge/tree/main/Arduino%20Firmware
Linux Server processing code
The python code runs on our Linux server and takes the serial JSON data and after extracting the values, posts it to our MQTT server to be used in Home Assistant.
The code can be downloaded from /Nest-to-1-wire-bridge/blob/main/Python%20Script/1wire-mqtt-bridge.py


Comments