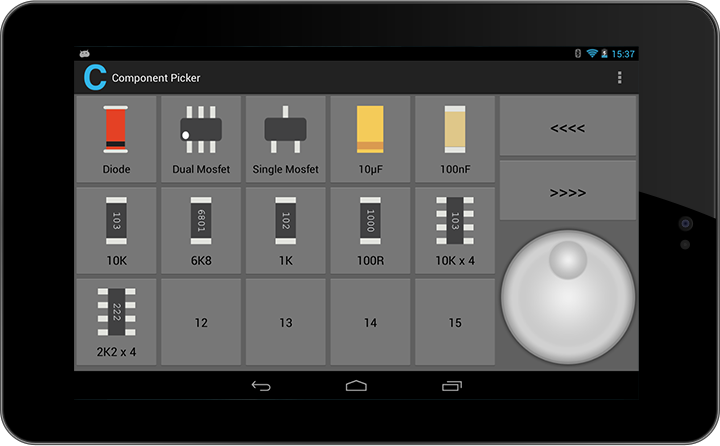
Following the Arduino pick and place update blog post video and Automatic component feeders post we have now completed the first version of the Android tablet control software which uses Bluetooth to communicate with an Arduino Mega to control an X and Y axis on the component selector and also to a second Arduino Mini board which controls the pick and place needle rotation.
 The system communicates using serial commands using Bluetooth between the Android tablet and Arduino Mega and this uses the AccelStepper library to allow much smoother control of the stepper motors.
The component picker assembly uses a pair of NEMA 17 motors to drive the X and Y axis driven via MD430 stepper motor drives sourced from eBay. The motors came from a scrapped vinyl cutter which was given to me a few years ago.
The Android app sends a single character to the control board to either select a component feeder, turn the picker needle or perform a reset of the system.
When a reset command is received or upon start up the Y axis retracts up until an IR break beam sensor is broken which then sets the Y axis to zero point. The X-axis then slowly moves to the side until the second IR break beam sensor is triggered which then sets the X-axis to zero point. All component pickers are then referenced by an array in the Arduino code for the stepper position.
On the back of the main pick and place, the machine is a dual break beam sensor Motion Direction Controller (code and circuit on GitHub) which sends back a command via interrupts on the Arduino to the Android app. On the next version of the app which will be fully automatic, this will tell the tablet that the component has been picked and the selector can now move to the next required component and also rotate the picker needle if required.
Whilst researching various Pick and Place systems and machines we looked at a lot of the commercial machines which cost several thousand for a manual system with basic tape holders to the fully automatic pick and place machines which cost tens of thousands and also at a lot of the DIY pick and place machines which hobbyists have made.
On the first version of our pick and place machine, we had basic tape holders which we found to be difficult and slow to use so we looked at a lot of the commercial feeders to see if we could make something similar at a reasonable cost. I found the Panasonic Ratchet Type Component Feeders on eBay which were being sold for only £20 each and after buying a couple of feeders and modifying them, we found it would be ideal for our needs and much cheaper and more reliable than trying to build our own feeders.
The eBay seller later listed 40 more of the feeders for both embossed reals and paper reals and we agreed for us to buy in bulk to take them all off their hands. Each feeder needed 7 different modifications on the mill so we created small cut files for each action and got the overall time to modify each feeder down to under 20 minutes.
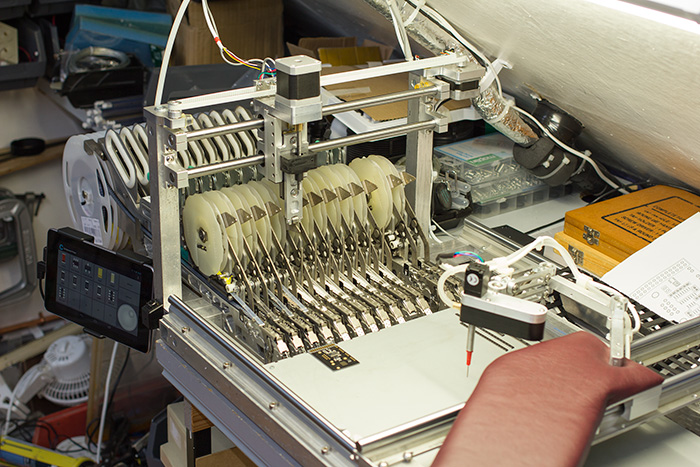
The photo shows the component feeder activated and the Nexus 7 tablet mounted on the side.
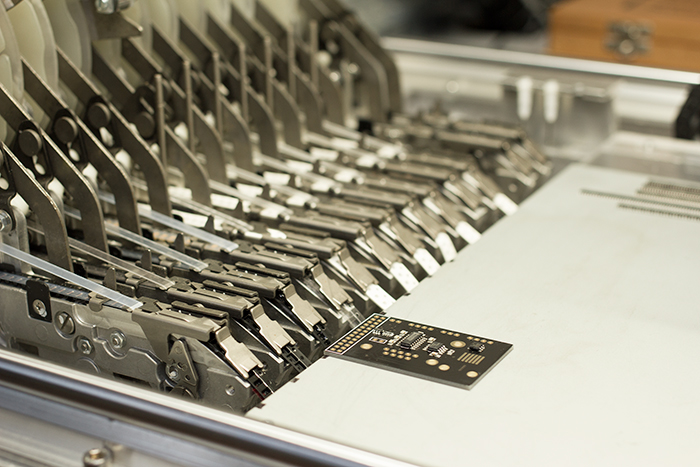
The photo shows the feeder dispenser end and a completed Com Pi board.
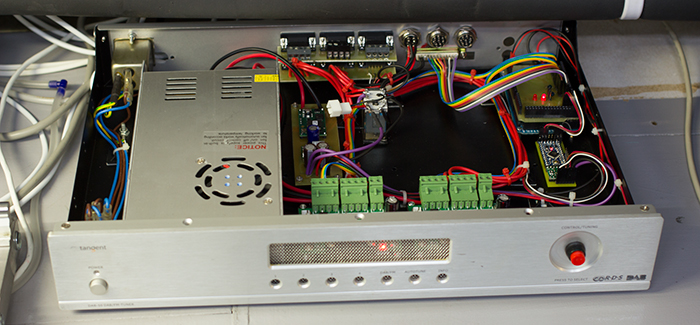
The completed control box with Arduino boards on right and power supply on left. The stepper drivers are at the front of the box with the green connectors.
All the code for his project including the Android application and graphics, Arduino code for the Mega and Mini boards and PIC processor code for the direction board is available to download from GitHub github.com/briandorey/manualpickandplacecontroller, The PCB files are in Diptrace format and you can download a demo version of Diptrace from www.diptrace.com
Zack Freedman
This is extremely classy. I'd love to build one for myself and the MakerBar hackerspace. What extrusion did you make the arm and rails from? Does the arm hold the vacuum in a constant alignment like a drafting machine?
Brian
The arms were cut from 10mm thick aluminum sheet with bearings from a RC Model shop for each end, and the lower rails and frame are square aluminum tubing. The picker isn't held in constant alignment as it pivots on the end of the picker arm which gives fine adjustment when placing the components on the boards.