A DIY optical camera flash or camera trigger using a laser and basic timer circuit.
I have always enjoyed trying to take water drop photos but getting the flash and camera to trigger at the right moment by hand was always very difficult.
After researching commercial (very expensive) and various DIY triggers which activate via a light beam, infrared or sound, I decided to try to make a trigger which would fire a remote flash using a red laser as the light source.
I found a lot of very useful info on www.instructables.com/id/Laser-Triggered-High-Speed-Photography/ regarding timer circuits and I was able to adapt and add modify a circuit posted on the website to use an optical isolator to trigger my external flash unit.
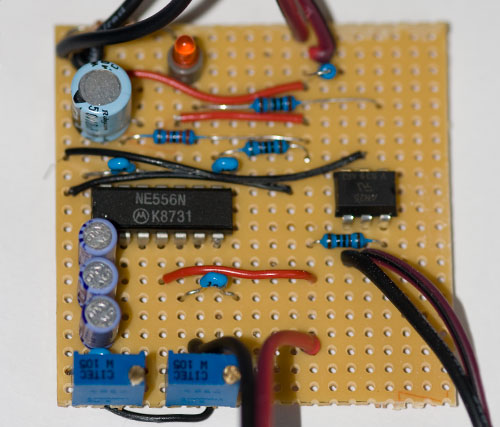
Parts List:
- Stripboard
- 1 x Photodiode
- 1 x Red Laser module 5V (this came from a gun sight but the laser from a laser pen should be ok)
- 1 x 556 timer chip
- 1 x High Voltage optical isolator
- 2 x 1M 22-turn variable resistor
- 2 x 1K 1/4 watt resistor
- 1 x 22K 1/4 watt resistor
- 2 x 120R 1/4 watt resistor
- 3 x 1uF 35V Electrolytic Cap
- 1 x 10uF 35V Electrolytic Cap
- 4 x 100n Ceramic Cap
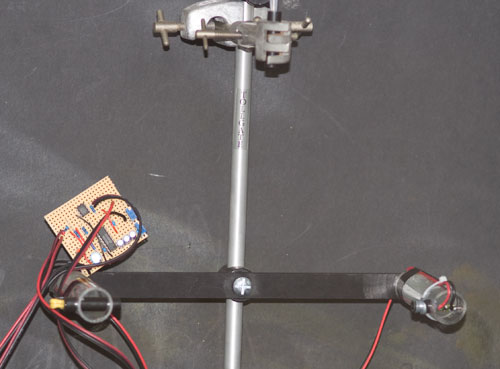
The prototype circuit board
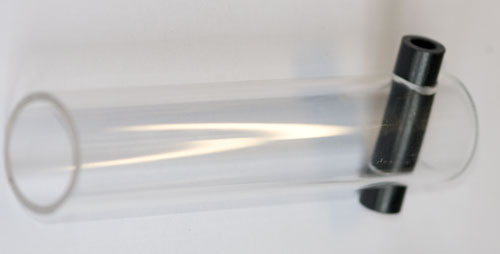
The mounting arms for the laser and photodiode were made from 25mm perspex tube and a led holder was made from 10mm black derlin with a 2mm hole for the laser beam to enter and a 5mm hole for the photodiode to sit in. This shields the photodiode from external light from the sides.
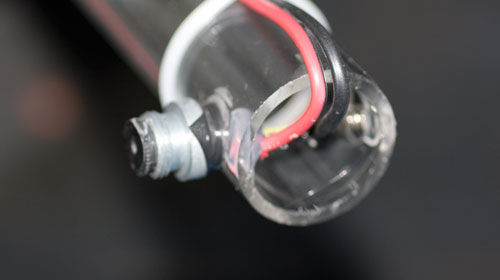
The laser module was fitted into the end of the mounting post using hot glue.
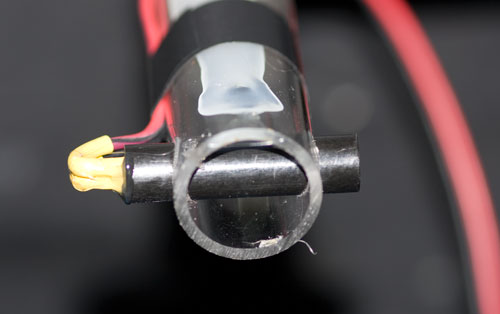
The completed photodiode assembly with hot glue is used to hold the diode in place.
The mounting arm for the unit was made by modifying the archery recurve bow stand. The perspex tubes were fitted to the existing bowstring clips using hot glue and a clamp from an old chemistry set is being used to hold a pipette to drop the water past the sensors.
Initial test shots were done using a old Jessops Portaflash Digital Studio Kit flash unit.
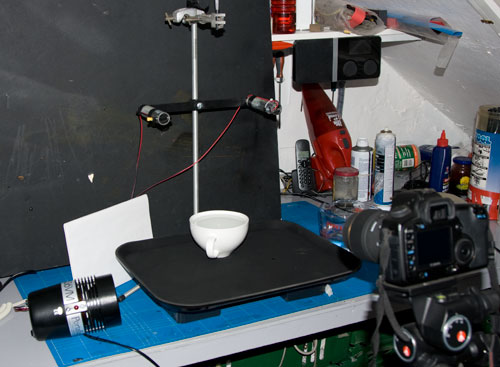
The next stage is to put the circuit into a plastic box and put a variable resistor on the side so I can adjust the time delay when triggering. I will then try the trigger on my Bowens Pro flashes as they have a much faster flash speed than the cheaper Jessops flashes.
Comments