
We have started working on the vision system for the DIY Pick and Place machine. We are going to use two cameras, one fixed on the base with a led lighting array around the camera and a “flying” camera mounted between the two picker needle systems.
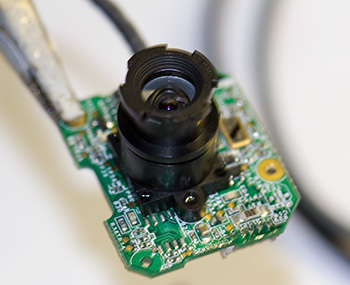
The base camera we are using is a Microsoft Xbox Live camera which has been removed from its plastic case and the lens modified so it will focus at a much shorter distance.
For chip detection, I am working with a library called AForce.NET http://www.aforgenet.com/ which is a C# framework for computer vision. I tried to use OpenCV but found that it didn’t seem to work with the x64 versions of Microsoft Windows we run on our computers and it runs better on the 32-bit editions.
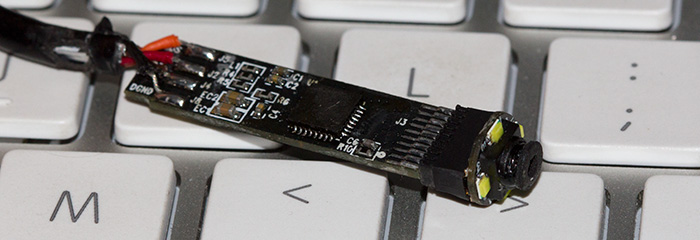
The photo shows the Microsoft camera module removed from its case.
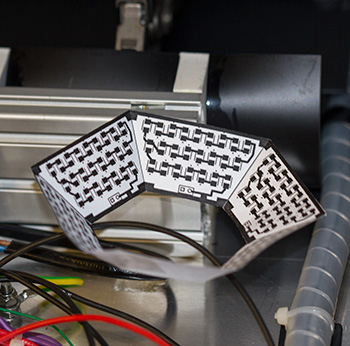
The camera will be fitted in the base looking up with a six-panel LED array which will be controlled via one of the 8 relays on the power board.
This will allow us to only turn on the led array when needed. The LED PCB have been ordered and will hopefully arrive in a couple of weeks.
The photo shows a paper mockup of the LED lighting boards which will be installed into the base of the Pick and Place machine.
The top camera is a modified “Waterproof Endoscope Borescope Snake Inspection Video Camera” from eBay which cost £11 with shipping from Hong Kong.
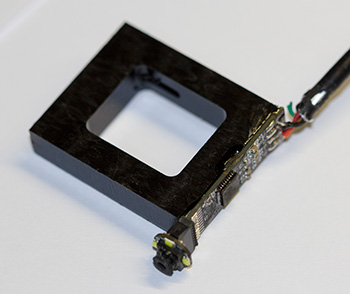
The camera module with its case was 10mm round and with the case removed it is now approx. 8mm wide. The camera module has been fitted to a plastic bracket which holds it out the same distance as the picker needles when fitted to the pick and place head assembly.
The camera's resolution is a maximum of 640x480 which seems to be high enough and with a fast enough frame rate to enable us to centre the boards when testing.
The photo shows the camera fitted to the plastic mounting bracket.


Comments