Last week I decided to upgrade my old Canon 5D Mk1 to a new camera as I wanted a higher resolution and better autofocus system for wildlife and landscapes.
I had been waiting for the new Canon 5D Mk IV which was officially announced on Thursday but after seeing the price of the new Mk IV which was a lot higher than the previous Mk III, I decided to order the Canon EOS 7D Mark II which has very good reviews for its focusing system and overall performance.
With the price saving over buying the full frame Canon 5D Mk IV, I ordered a new longer zoom lens and after looking at the Canon EF 100-400mm f/4.5-5.6L IS II USM Lens which Andy Farrer uses for both wildlife and landscapes, I place an order online for the new kit.
With the 1.6 sensor crop factor, this gives an effective zoom range of 160mm to 640mm which should be ideal for wildlife photos.
The camera and lens arrived on Friday and I walked for a couple of miles with the camera in local fields to try to find some wildlife. I soon found that the camera was difficult to carry comfortably with the supplied shoulder strap and also keeping one hand on the lens to support the weight and so when I got home I started to search for a handle/grip which could be fitted to the lens tripod mount.
I found a few commercial mounts and handles which are designed for filming but these all had a very wide spacing from the lens and were very bulky and added a lot of additional weight.
I also search for wider straps and found a lot of recommendations for the OP/TECH USA Pro Strap which was £15 from amazon.
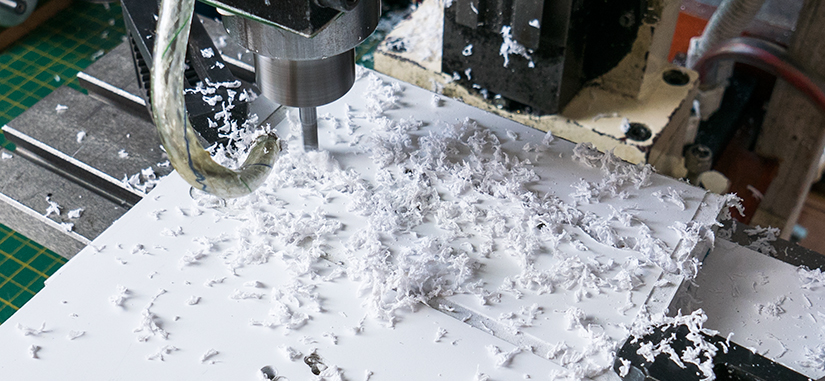
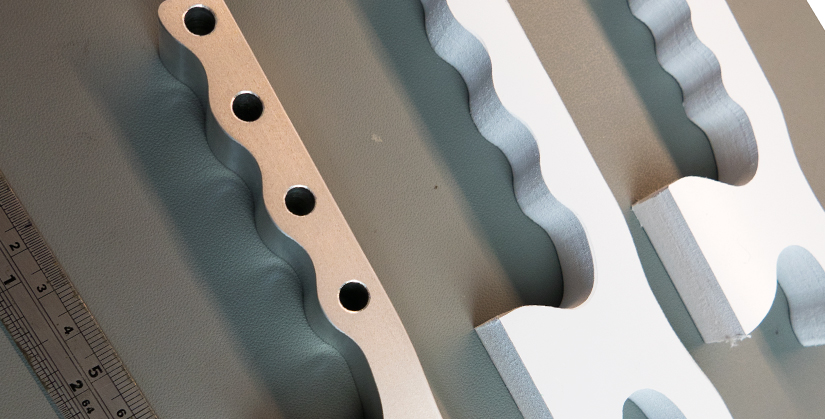
For a new grip handle, we designed a hand grip in Adobe Illustrator and made some different mock-ups from foamex board which is very easy to machine. 5mm deep cuts can be easily milled at 400mm per minute using a 6mm end mill cutter.
Milling the test versions.
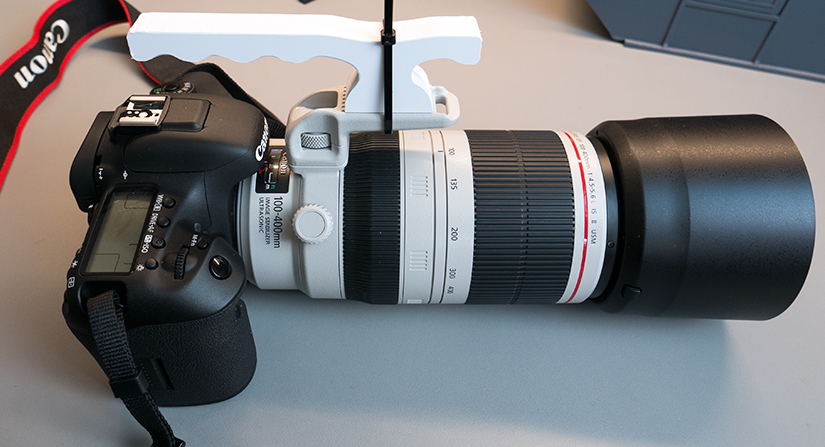
Test handle on the camera.
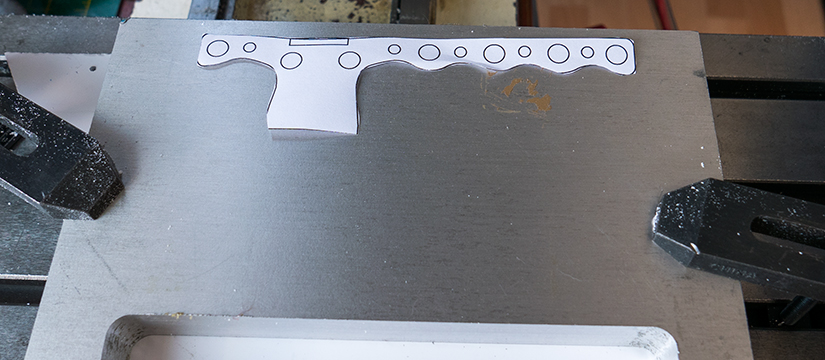
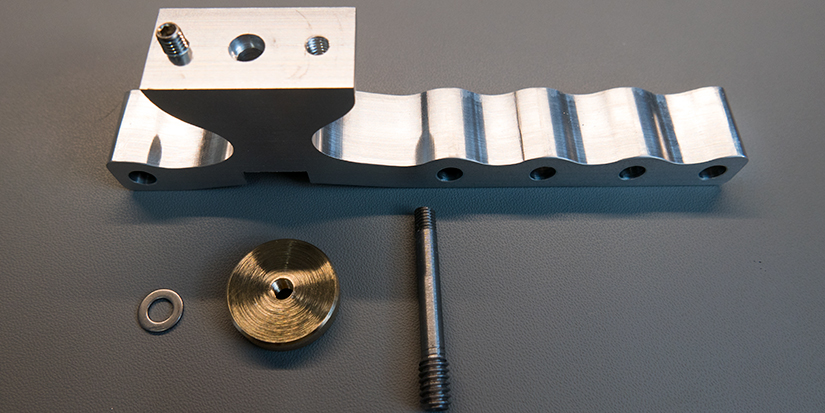
After deciding on the handle size we started cutting the final version from a sheet of 20mm aluminium which took around 40 minutes to mill.
Ready to cut the final version.
Final version next to two design mockups.
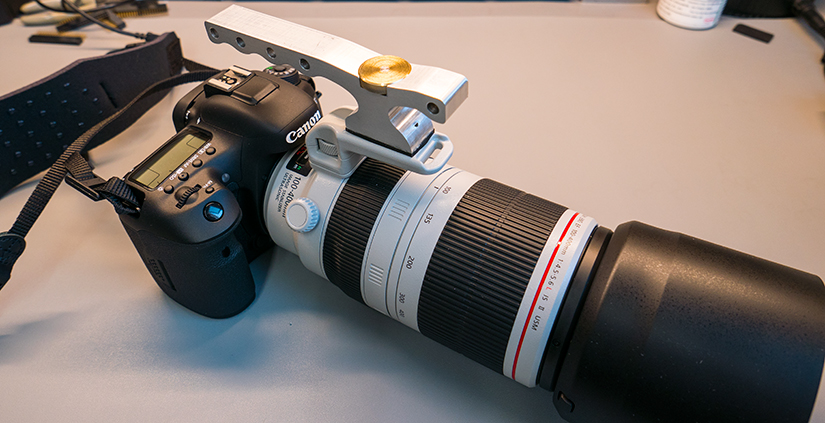
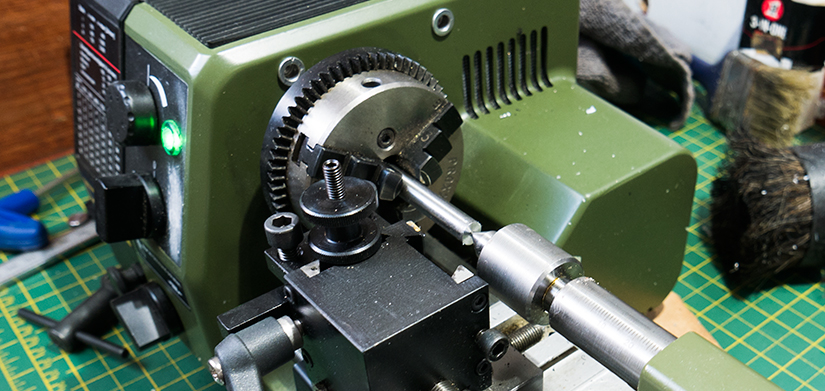
We made a custom screw from a section of tool steel and this was cut on the lathe to have a ¼ inch 20 TPI thread on one end for the camera lens bracket (standard camera mount thread) and the other end was cut with an M5 thread to fit into the brass top nut.
A 22mm diameter nut was created from a section of brass rod and the centre was tapped to M5 thread.
Cutting the tool steel for the screw.
Once the outside was cut we then drilled the hole for the mounting screw using a 5mm drill and the top of the handle was milled to have a 22.5mm cut-out for the brass nut/screw assembly. This allows me to screw the handle to the lens and the nut is flush with the surface when tight.
Once all the parts had been machined and cleaned we test-fitted it to the camera lens and found that there was a small amount of rotation even though we had a locator pin. We resolved this by adding a thin rubber pad to the handle.
The finished parts ready to fit on the camera
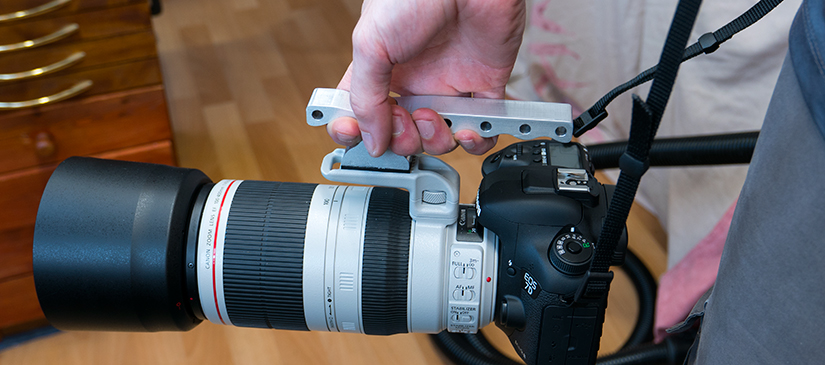
The new handle/grip works very well when either on top of the lens or at 90 degrees to the left which then allows me to keep one hand on the lens when the camera is on the shoulder strap or with the handle under the lens it makes a very good support rest for handheld shooting or when resting on things like fence posts to steady long shots.
The total cost of the materials to build this handle/grip was less than £8 which is a lot less than the commercial handles available to buy online.
The completed mount with a rubber spacer to stop rotation and vibration.
You can download the PDF design file and also the milling cut paths from the links below.
LucyLovesBetty
This is awesome!! Kudos!!
Mark Tiller
Hi Brian,
Great piece of kit and something I have been after for a while. Unfortunately I don't have access to the equipment to make one. How much would you charge to make one for me?
Regards
Mark
Brian
Hi Mark
Sorry but I wont be able to make a bracket as our CNC mill has issues with the drives at the moment. Also it took over 9 hours of milling to machine and several mill bits.
You could make the same shape using a jigsaw to cut out the profile and then files to smooth the edges.